How to Use Google Tag Manager: The Only Guide You’ll Ever Need (with Video Tutorials!)
Google Tag Manager (GTM) is a powerful tool that can transform the way you manage your tags and tracking codes on your website. But it can be difficult to use and set up correctly.
That’s why I created this handy guide to help you unlock the true potential of Google Tag Manager! Together, we’ll delve into the world of GTM, unpacking its powerhouse components: Tags, triggers, and variables. But we won’t stop at there; I’ll personally guide you through the practical steps of setting up GTM on your website, empowering you to create, manage, and deploy these elements like a pro.
Whether you’re a business owner seeking more control over your website, a marketer wanting to streamline your tracking process, or a developer looking to simplify code management, this guide is crafted with you in mind.
Table of contents
- What is Google Tag Manager (+What is it used for)?
- Benefits of using Google Tag Manager
- How to create a GTM account
- How to add Google Tag Manager to your website
- Advanced features to track using GTM
What is Google Tag Manager used for?
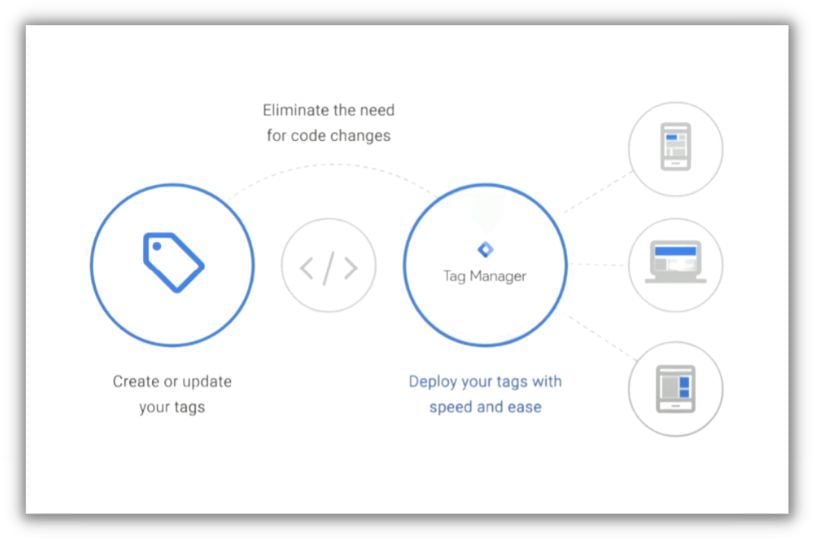
Google Tag Manager (GTM) is a free tool developed by Google that allows website owners to manage and deploy marketing tags (snippets of code or tracking pixels) on their website (or mobile app) without having to modify the code. This is done by installing a single container code snippet to the source code, after which all other tags can be managed and deployed from the GTM interface. This effectively removes the need for developers’ intervention for each tag installation and offers marketers greater flexibility and control over their digital marketing endeavors.
Google Tag Manager has three key components:
- Tags: Tags are snippets of code that execute on a page or mobile app. They can serve a variety of uses, but most of the tags used in GTM are designed to send measurement information from your site to a third party. Examples include the Google Analytics tag and the Google Ads conversion tag.
- Triggers: Triggers are conditions that need to be met for a tag to execute. For instance, you could set a trigger for a tag to execute when a specific page is viewed or when a particular button is clicked.
- Variables: Variables provide additional information that GTM might need for the tag and trigger to work. For example, if you’re setting a trigger for a particular URL, the URL is the variable.
I go into more detail about understanding Google Tag Manager in this video:
Benefits of using Google Tag Manager
Why use Google Tag Manager? Consider these benefits.
- Efficiency and speed: GTM allows marketers and developers to work more efficiently by enabling the addition or update of tags without requiring code changes on the website. This greatly reduces deployment times and allows marketing campaigns to be launched faster.
- Flexibility: GTM provides a high degree of flexibility to digital marketers by allowing them to configure and deploy tags based on their specific needs, without any reliance on developers.
- Error reduction: GTM comes with a debugging option, which ensures tags are working correctly before they go live. This feature significantly minimizes the chances of errors.
- Version control: GTM automatically creates a new version every time changes are made. If something goes wrong, it’s easy to roll back to a previous version.
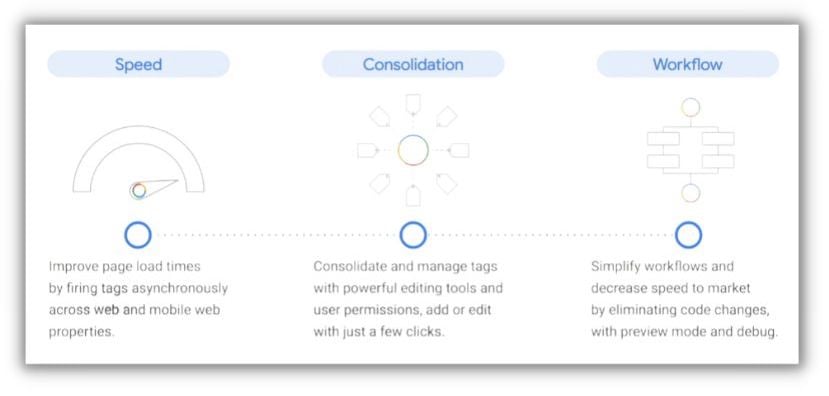
- Improved site performance: By allowing asynchronous tag firing, GTM ensures that slow-loading tags don’t hamper the loading speed of your website.
- Consolidation and organization: GTM helps in maintaining a clean and organized website code by keeping all the tags in one place.
How to create a Google Tag Manager account
Use this step-by-step guide to create a GTM account.
- Visit the Google Tag Manager homepage: Start by navigating to the Google Tag Manager homepage (tagmanager.google.com).

- Create an account: Click on the “Start for free” button if you don’t have an account or click on “Create Account” if you are already logged in with a Google account.
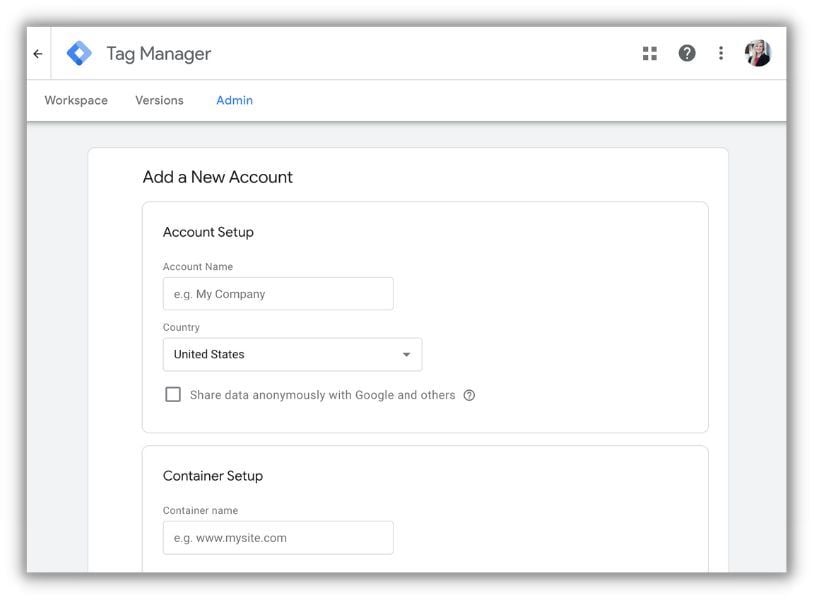
- Enter account details: You will be asked to enter an account name (usually your company name) and choose your country.
- Set up a container: Next, you’ll need to create a container for your website. Enter your website’s name, and select where you want to use Tag Manager (Web, iOS, Android, or AMP).
- Accept Terms of Service: After creating your container, review and accept the Google Tag Manager Terms of Service.
- Your GTM account is ready: Once you’ve done that, your GTM account is ready to go, and you will be taken to your GTM Workspace.
You can also follow along with the steps here:
How to install Google Tag Manager on your website
After creating your GTM account, you will need to install it on your website. Here’s a step-by-step guide:
- Access the GTM code: In your Google Tag Manager account, you’ll see a popup window with the Google Tag Manager code snippets. These are two pieces of code that need to be added to your site.

- Install the first code snippet: The first piece of code needs to be pasted as high in the <head> of the page as possible. This ensures that Tag Manager can load synchronously and can be a part of rendering the page.
- Install the second code snippet: The second piece of code needs to be pasted immediately after the opening <body> tag on each page of your site. This ensures that Tag Manager functions even if JavaScript is disabled in the viewer’s browser.
- Update your website: After pasting the codes in the correct locations, save your changes and publish your website.
- Verify the Installation: To confirm that you’ve installed Google Tag Manager correctly, you can use the preview mode in GTM or use the Tag Assistant Chrome extension. If installed correctly, you should see the GTM container ID appear when you visit your site.

Remember, for the Tag Manager to manage your tags, you need to add and configure them within the GTM interface. GTM does not automatically take over tags that are hardcoded on your site.
Get a full video tutorial here:
What should I track in Google Tag Manager?
Here are some advanced features within Google Tag Manager you can use to track information effectively for your business.
Data layer and its usage
The data layer is a JavaScript object that is used in most tag management systems, including Google Tag Manager, to safely pass information from your website to your tag manager container. It acts as a central repository of data on your site that GTM can access to read values or track changes.
When you’re running an ecommerce store, it’s really useful to track extra details about purchases. This helps you understand your customers better and make smarter business decisions. To do this, you can use something called a data layer. It’s like a special container that holds all the important information. In the code snippet you shared, the data layer is capturing specific details about a conversion event, like when someone makes a purchase.
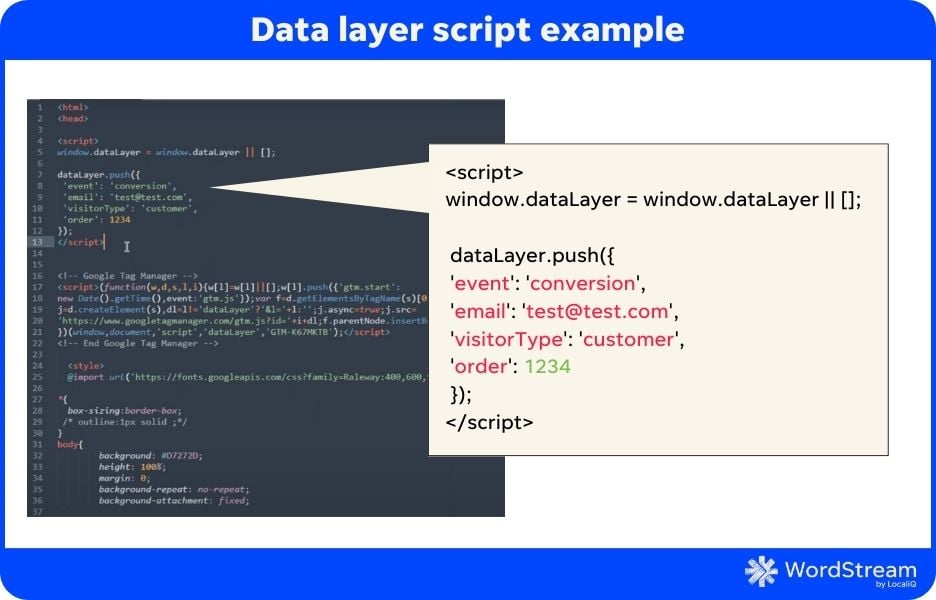
In this code, the window.dataLayer object is initialized (if it doesn’t already exist) as an array. The push() method is then used to add a JavaScript object to the array, containing specific key-value pairs related to the purchase event.
The ‘event’ key is set to ‘conversion’, indicating that a conversion event is being tracked. The ’email’ key represents the associated email address, while the ‘visitorType’ key denotes the type of visitor, specifically a customer. Additionally, the ‘order’ key holds the value 1234, which could represent an order ID or any other relevant identifier.
It’s important to note that for more granular tracking in ecommerce scenarios, such as enhanced ecommerce tracking, Google provides a recommended data layer structure. This structure allows for more comprehensive and detailed tracking of ecommerce-related events, enabling powerful analytics and insights for your online store’s performance optimization.
Custom HTML Tags
Custom HTML tags in GTM are particularly useful when you want to execute a tag that is not part of the built-in templates provided by GTM, or when you want to customize a tag beyond what the available templates allow.
Let’s consider an example where you want to include a custom chatbot JavaScript code from a third-party service on your website. Here’s how you would do this:
- Within your GTM workspace, click on “Tags,” followed by “New” to create a new tag.

- For the “Tag Configuration,” select “Custom HTML.”
- Paste your third-party JavaScript code into the HTML text area provided.
- Specify the trigger for this tag (for instance, you might want this tag to fire on “All Pages”).
- Save and publish the tag.

Once the tag is published, it will inject your custom HTML (in this case, the chatbot JavaScript code) based on the trigger conditions you specified. This means you can manage and deploy custom scripts across your site with ease, directly from GTM.
Get more details about these features in this video tutorial:
Get started with Google Tag Manager
By centralizing the tagging and tracking process using Google Tag Manager, you can streamline your workflow, increase efficiency, and reduce the likelihood of errors that could occur from manual code changes. With features such as the data layer and the ability to use custom HTML tags, GTM gives you a tremendous amount of flexibility to track almost any kind of user interaction on your site.
As we’ve seen in this guide, setting up GTM involves creating an account, installing it on your website, understanding its components (tags, triggers, variables), and leveraging its features like the data layer and custom HTML tags. While it might seem a little complex at first, with practice, you’ll find that GTM can be an indispensable part of your digital marketing toolkit.
If you’re keen to delve deeper and learn more about GTM, here are some additional resources you might find useful:
- Google’s Official Tag Manager Help Center
- Google Analytics Academy – Tag Manager Fundamentals
- Google Tag Manager Community on Reddit
Remember, mastering Google Tag Manager doesn’t happen overnight. It takes time, patience, and consistent practice. But with its capabilities, it’s definitely worth the effort.
Happy tagging!


Meet The Author
Alessandro Colarossi
Alessandro is an accomplished digital marketing professional with over a decade of experience in various tech fields. He currently works as a Customer Success Manager at Google and teaches Digital Marketing at Sheridan College in Ontario, Canada. He also co-authored the book Becoming Artificial and writes articles for Philosophy Now Magazine and various digital marketing websites. You can learn more about Alessandro at alessandrocolarossi.com.


Comments
Please read our Comment Policy before commenting.