Easy FancyBox Docs
Image maps and Easy FancyBox
Big News!
New Ownership, Pro Plugin, and Account Area!
Getting Started
Disable Easy FancyBox on Certain Pages
Images
Open Full Gallery from Single Thumbnail
Video
Modals & Dialogs
Show Inline Content in Lightbox
Other Content Types
Troubleshooting
Third Party Integrations
Pro Plugin
[Pro] How to install Easy FancyBox Pro
[Pro] Change Your Registered License Domain
Image maps allow you to create different clickable zones across one image. These zones are supported by Easy FancyBox and so, can be made to open up in the light box.
Example showing an image of France, with one clickable zone situated over the Ardèche region:

Although image maps are not by default supported by WordPress and are not easy to create, it can be done following the steps below. The exact method depends on the location where you want your image map and the editor used on your WordPress site: in a sidebar Widget or a post or page, with either the new Gutenberg/Block editor (WP 5+) or the Classic editor (pre-WP5 or WP5+ with the Classic Editor plugin installed) and on which image map creation tool is used.
Here’s how to re-create the image map example above in three steps:
1. Create the map code
Creating an image map HTML code can be done with several tools. There is software you can install or online tools to pick from. In this example, we’ll be using the free online tool https://www.image-map.net/ (opens in a new browser tab)
Choose Load Image from Website, enter the URL https://upload.wikimedia.org/wikipedia/commons/d/d9/Ard%C3%A8che-Position.svg and hit Continue.
The image will now show on the page and you can start configuring and mapping your area:
- Shape: Poly (because the region we want to make clickable in this case is not rectangular or round)
- Link: https://en.wikipedia.org/wiki/Ard%C3%A8che
- Title: Ardèche
- Target: _blank (does not really matter as it will be opening up in a light box later anyway)
Next, start placing dots over the image to outline the area. It may be as many or as few dots as you like as long as it closely resembles the shape we want to make clickable. You can place a dot with a left-click, move it with click-drag-release, remove it with a right-click.
Note: Added dots have an order. You cannot add a new dot between already placed dots without winding up with a weird shape or crossing lines. You’ll have to carefully move each preceding dot up the chain to keep a consistent shape.
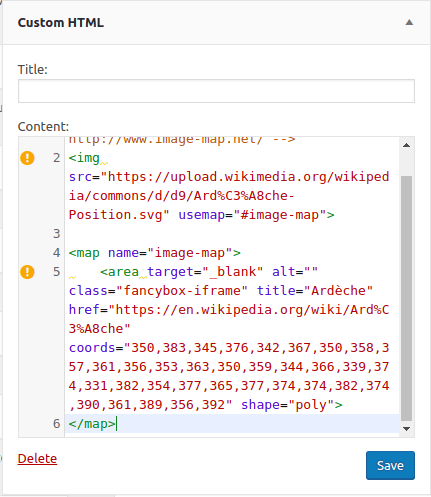
Finally, when you are happy (enough) with your created area, hit the button Show Me the Code! and copy it. It will look something like this:
<!-- Image Map Generated by http://www.image-map.net/ --><img src="https://upload.wikimedia.org/wikipedia/commons/d/d9/Ard%C3%A8che-Position.svg" usemap="#image-map"><map name="image-map"> <area target="_blank" alt="" title="Ardèche" href="https://en.wikipedia.org/wiki/Ard%C3%A8che" coords="350,383,345,376,342,367,350,358,357,361,356,353,363,350,359,344,366,339,374,331,382,354,377,365,377,374,374,382,374,390,361,389,356,392" shape="poly"></map> |
2. Place the map code
Depending in where you want your image map:
Sidebar or footer
Add a Custom HTML widget to the sidebar or footer area and paste the image map code into it.
Notes:
a. The image used in this example will be too large for most sidebars. The image will be reduced to fit (by CSS rules in your theme) but the mapped area coordinates will not adapt accordingly. This in turn, will cause the map to not function as expected. Unless you use an image that does not exceed the sidebar width or add the style rule style=”max-width:none” proposed in the last step.
b. The exclamation marks on the left are to warn you about missing alt attributes. You can add these manually.
Post or page
Depending on your editor:
Block editor
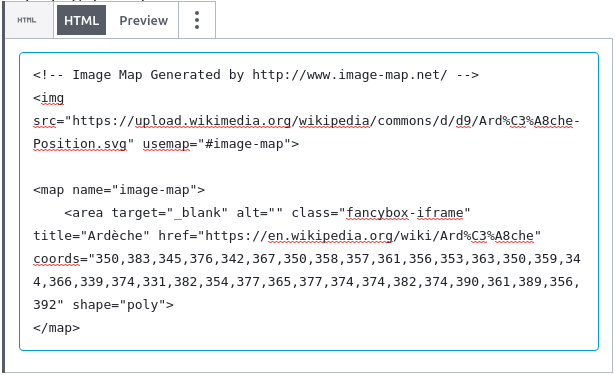
Add a Custom HTML block and paste the image map code into it.
Classic editor
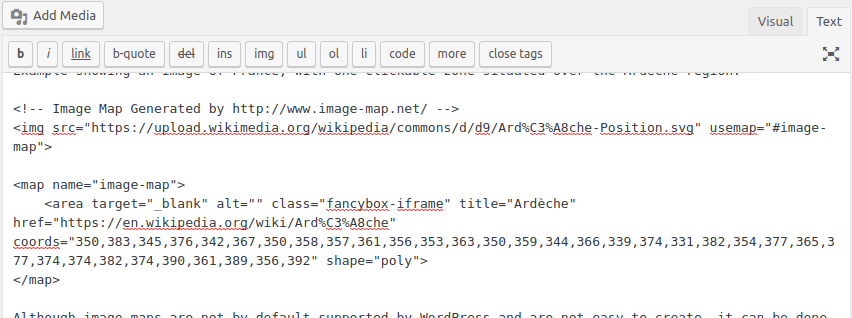
Switch the editor to the Text tab, find the place where you want your image map to appear among the raw HTML and past the image map code there.
3. Adapt the map code
To start, we’ll add a style attribute to the ground image to prevent it from being reduced in size on small screens:
style="max-width:none"Note: This goes against adaptive web design but if we do not do this, the mapped zones will not be in the correct place anymore or even be moved off the image. So the choice really is between what looks good and what works on all screen sizes.
And next, since we are linking to an external web page, we need to open the light box, in iframe mode.
Note: Adapting the code is needed in this case, because auto-detection is not possible here. If you use links to media like images, video or PDF files, and you have auto-detection enabled, you won’t need to take this last step.
Make sure you have the option iFrame enabled on Settings > Media. Then we need to add a specific class attribute to each link in the map code:
class="fancybox-iframe"And to round it up, add missing alt attributes to the image and area tags.
Your code snippet will now look like this:
| 123456 | <!-- Image Map Generated by http://www.image-map.net/ --><imgstyle="max-width:none"alt="France"src="https://upload.wikimedia.org/wikipedia/commons/d/d9/Ard%C3%A8che-Position.svg"usemap="#image-map"><mapname="image-map"> <areatarget="_blank"alt="Ardèche"style="max-width:none"class="fancybox-iframe"title="Ardèche"href="https://en.wikipedia.org/wiki/Ard%C3%A8che"coords="350,383,345,376,342,367,350,358,357,361,356,353,363,350,359,344,366,339,374,331,382,354,377,365,377,374,374,382,374,390,361,389,356,392"shape="poly"></map> |
Save and… Enjoy!