About Laptop HP 17-cn1053cl Specs
HP 17-cn1053cl is a 17-inch home & business laptop that was designed for general use by HP. It’s popular with plenty of users due to its fast performance, large screen, and reasonable price. You can view HP 17-cn1053cl specs listed as follows to know more about this laptop.
- Processor: Intel Core i5-1155G7
- Memory: 12GB DDR4 3200MHz RAM
- Video Graphics: Intel Iris Xe Graphics; Integrated
- Storage: 1TB 5400 rpm SATA HDD
- Display: 17.3″ diagonal, FHD (1920 x 1080), IPS, anti-glare, 250 nits, 45% NTSC
- Battery type: 3-cell, 41 Wh Li-ion (Up to 6 hours and 30 minutes)
- External ports: 1 SuperSpeed USB Type-C 5Gbps signaling rate; 2 SuperSpeed USB Type-A 5Gbps signaling rate; 1 HDMI 1.4b; 1 AC smart pin; 1 headphone/microphone combo
Why You Need HP 17-cn1053cl SSD Upgrade
As mentioned earlier, the HP 17-cn1053cl laptop is equipped with a 5400 rpm HDD, which makes it slow to boot and run. To solve this problem, you may consider upgrading your HP 17-cn1053cl HDD to SSD. This is helpful to boost your PC’s performance.
In addition to improved performance, the HP 17-cn1053cl SSD upgrade also brings many other benefits. If your HP 17-cn1053cl notebook is using an HDD, you’d better replace it with an SSD. Here are the main reasons:
- You can get more disk storage by upgrading the HDD to a larger SSD.
- SSDs always offer faster boot times and quicker app loads than HDDs.
- SSDs are more durable and less prone to data corruption and physical damage compared to HDDs.
After learning the benefits of HP laptop 17-cn1053cl SSD upgrade, let’s get down to how to upgrade HP 17-cn1053cl SSD.
How to Upgrade HP 17-cn1053cl SSD Without Data Loss
In this part, we’ll guide you to upgrading your HP 17-cn1053cl SSD step by step. Simply keep reading to get what you want to know.
Part 1: Migrate OS to the New SSD
For the HP 17-cn1053cl SSD upgrade, we’d like to recommend you transfer OS from the current HDD to the new SSD first. By doing so, you can upgrade your laptop to SSD efficiently without reinstalling the OS. To execute the operation, you may need to make use of hard disk clone software. MiniTool Partition Wizard is a great choice.
It’s a professional and safe partition manager that enables you to clone Windows 10 to SSD with its Migrate OS to SSD/HD feature. Besides, it also supports partition creating/formatting/resizing/deleting, MBR2GPT conversion without losing data, SSD data recovery, and other tasks related to partition/disk management.
Download and install MiniTool Partition Wizard on your laptop. Then follow the given steps to start OS migration.
MiniTool Partition Wizard DemoClick to Download100%Clean & Safe
Step 1: Connect the new SSD to your computer through the SSD enclosure or SATA to USB cable. Then get into the main interface of MiniTool Partition Wizard.
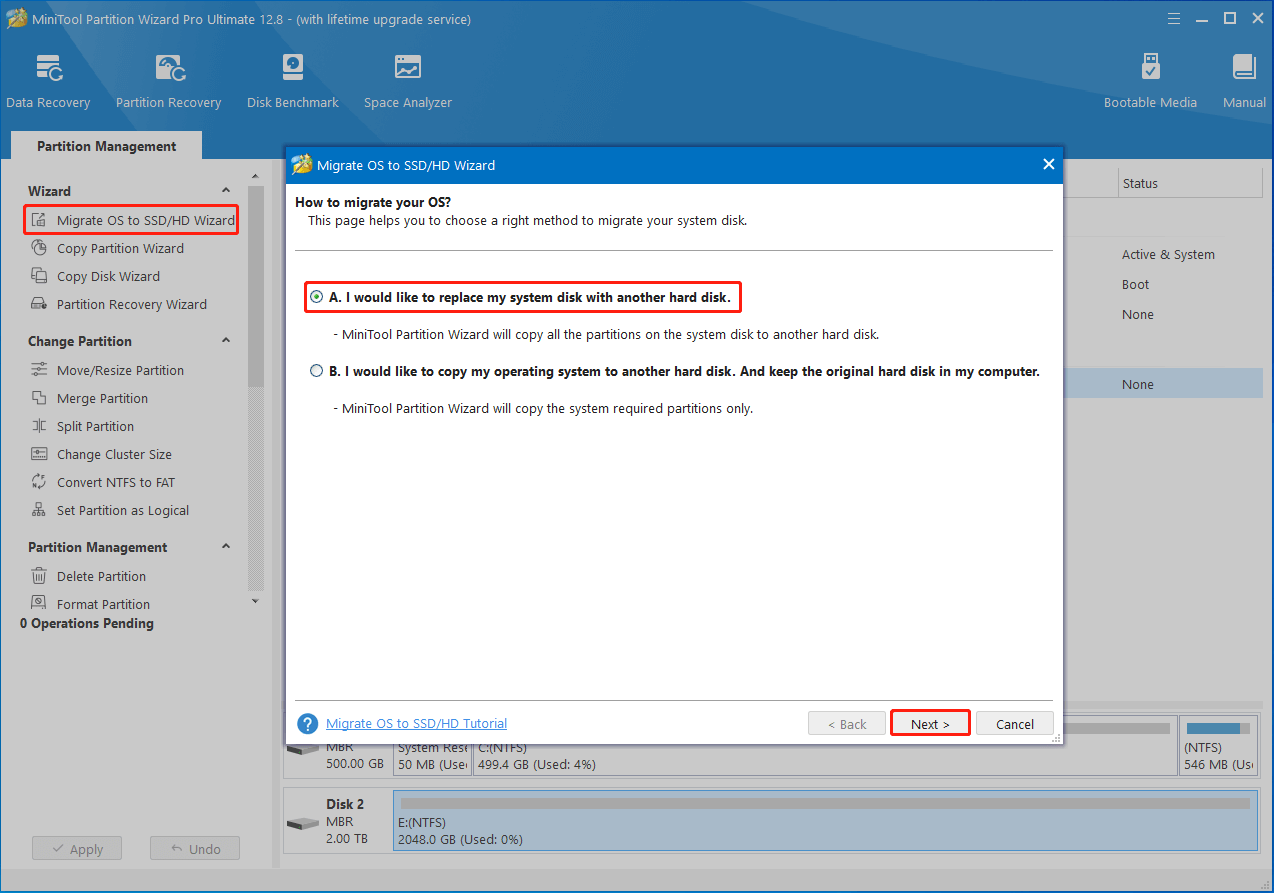
Step 2: Select Migrate OS to SSD/HD Wizard from the left panel. In the pop-up window, select Option A and click Next.
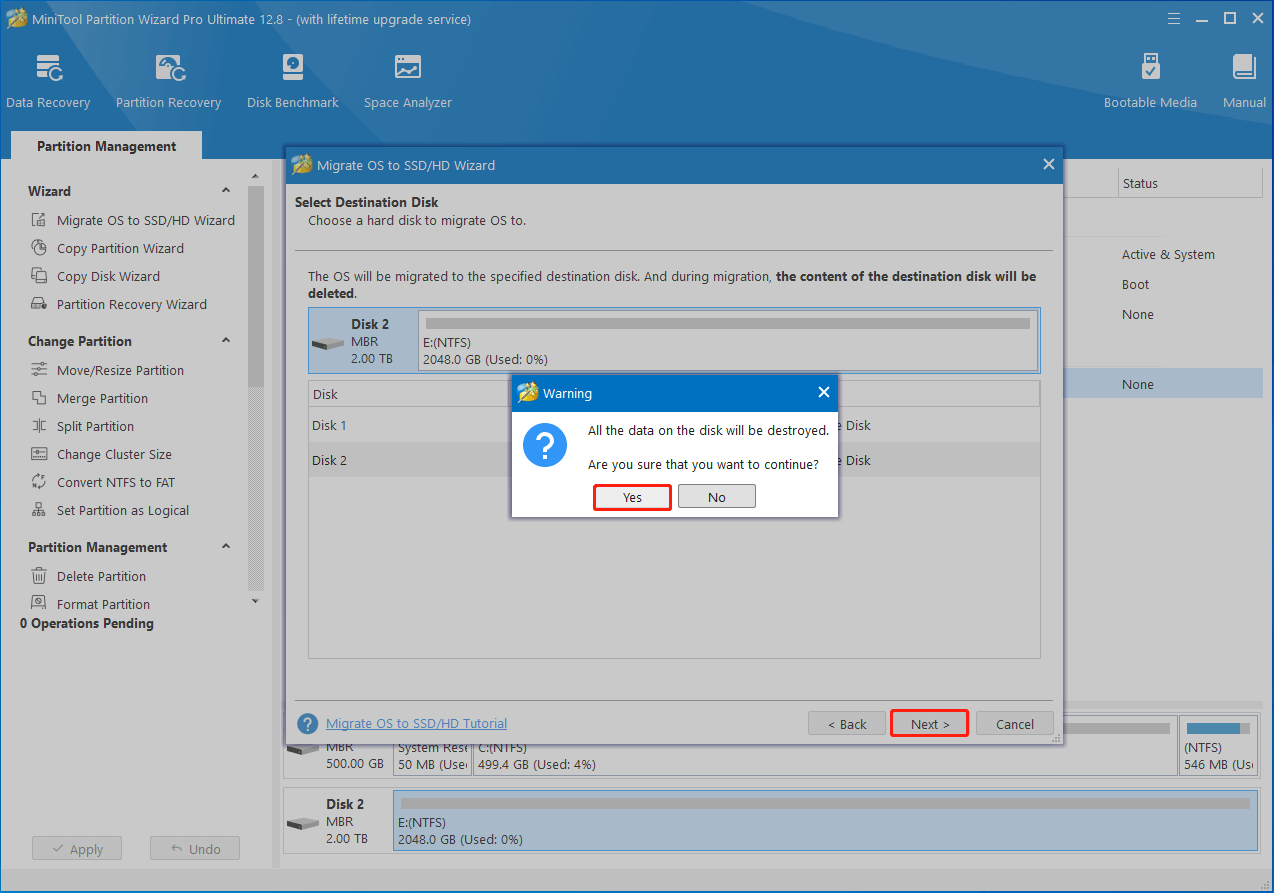
Step 3: After that, choose the new SSD as the destination disk to migrate OS to and then click Next. When prompted, click Yes for confirmation.
Step 4: In the next window, adjust the copy options and target disk layout according to your preference. Then click Next to move on.

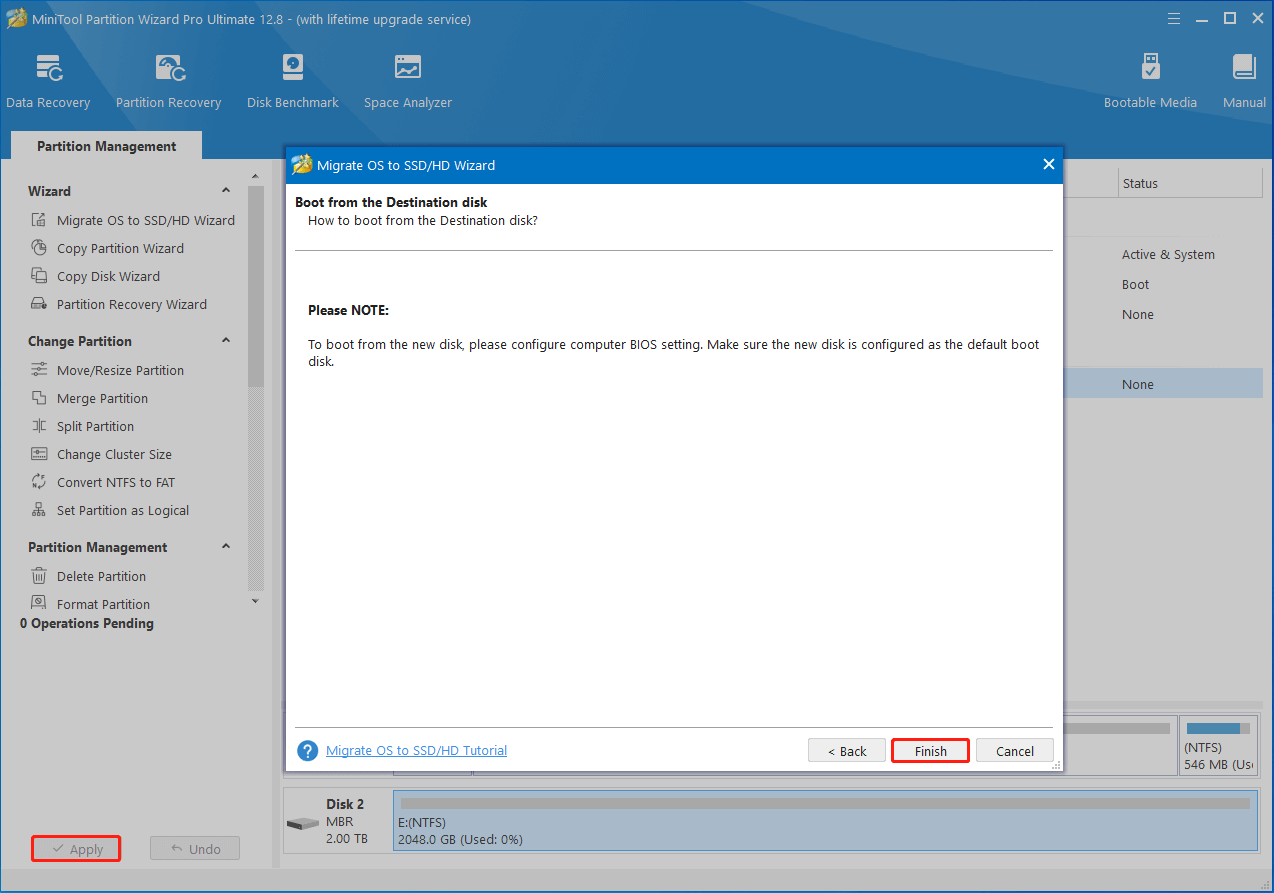
Step 5: Read the note that tells you how to boot from the new disk. Then click Finish and Apply to carry out the pending operation.
Part 2: Replace Your Old HDD with the New SSD
Once the cloning process completes, you can now replace the old hard drive disk with the new SSD while preserving all the data. Here’s how to do that:
- Shut down your laptop and then unplug the power cord from the AC outlet and the computer.
- Disconnect all peripheral devices including the new SSD from the computer.
- Turn over the laptop and peel the rubber feet off the bottom of the device.
- Unscrew the screws that secure the bottom cover using a Phillips screwdriver. Then pry the bottom cover up and remove it.
- Remove the screws that secure the battery and then slide the battery out.
- Find your hard drive. Disconnect the hard drive cable and then lift the hard drive out.
- After that, install the new SSD properly and gently.
- Reverse this procedure to put the battery and bottom cover back in place.
Bottom Line
Upgrading HP 17-cn1053cl SSD is a recommended way to boost your PC’s performance and storage. When you are planning to run an HP 17-cn1053cl SSD upgrade, you can refer to the above instructions. If you encounter some issues while using MiniTool Partition Wizard, please feel free to contact us via [email protected]. We’ll get back to you as quickly as we can.