
Are you looking for new ways to monetize your blog or expand your business?
Have you written 4 or more blog posts around a related topic?
If so, you’ve already done the hardest part in publishing an online course, which is creating the actual lesson content!
In this guide, we’ll show you how you can recycle and repurpose existing blog posts to have a new online course ready for new paying customers in a few hours.
Sound too good to be true? We’ve seen this method work time and time again.
Starting With Content
Creating every new online course should ideally start with the lesson content. But, instead, we find that too many worry about other factors, which may be important, but don’t need to be ironed out at this time.
We’re talking wrestling with questions like:
- How much should a course cost?
- What LMS platform or plugin should I use?
- How will I take payment?
- What will it look like?
- How long should the course be?
- What about community? Do I need a community?
Before you get to any of the above, begin by creating an outline or overview of the topics and the outcomes you want from students.
However, this is often where those that want to create an online course fail. It can be overwhelming and intimidating to narrow down your ideas or know exactly what to include.
And that is where those of you with an existing blog have a massive advantage.
You likely already have more than enough content to create and publish your first online course. The idea is to take as much of the work you’ve already done, even if posts are several years old, and combine them so that you can re-package and even sell in a course.
Take a look through your most popular posts (by traffic) or the posts that you are most proud of. Do you already have other posts around the same topic or a related subject?
Not critical, but even better would be if you happen to have videos or other types of content around the topic that you can add to course lessons. Tweets and TikTok videos can make great filler content to break up lessons and engage students, and if you created it, it’s fair game to be re-used in your course.
Fire up a new Google Doc (or whatever you like to use to take notes), and copy/paste the links that you have for the topic that you’ve chosen.
As long as you have at least 4 or 5 items on your list, you have enough to try out creating your first course. A micro-course, a short course that can be completed in as little as 30 minutes to an hour, is a popular and easy way to start.
If you have 10 or more items, you may wish to pair it down to the most critical for your first course, but this will depend on the content, your students, and the time you want to invest in launching it all.
The choice is all yours!
You don’t need to order or organize your lessons just yet, we’ll take care of that in a bit.
The Free Posts to Course Plugin
We’ll focus on how this works when using the Sensei LMS plugin on an existing WordPress site. But the truth is, you could do this all on any online course platform, you might just need to copy and paste your blog post content into the editor you are using. With Sensei, you can automate the entire thing.
We’ll assume that you already have a WordPress site where the online course will live since you already have a blog.
Go to Posts > All Posts in the WordPress dashboard of your site or blog.
For the import tool to work, you’ll need to have each post that will be copied to a course have the same post category assigned to it.
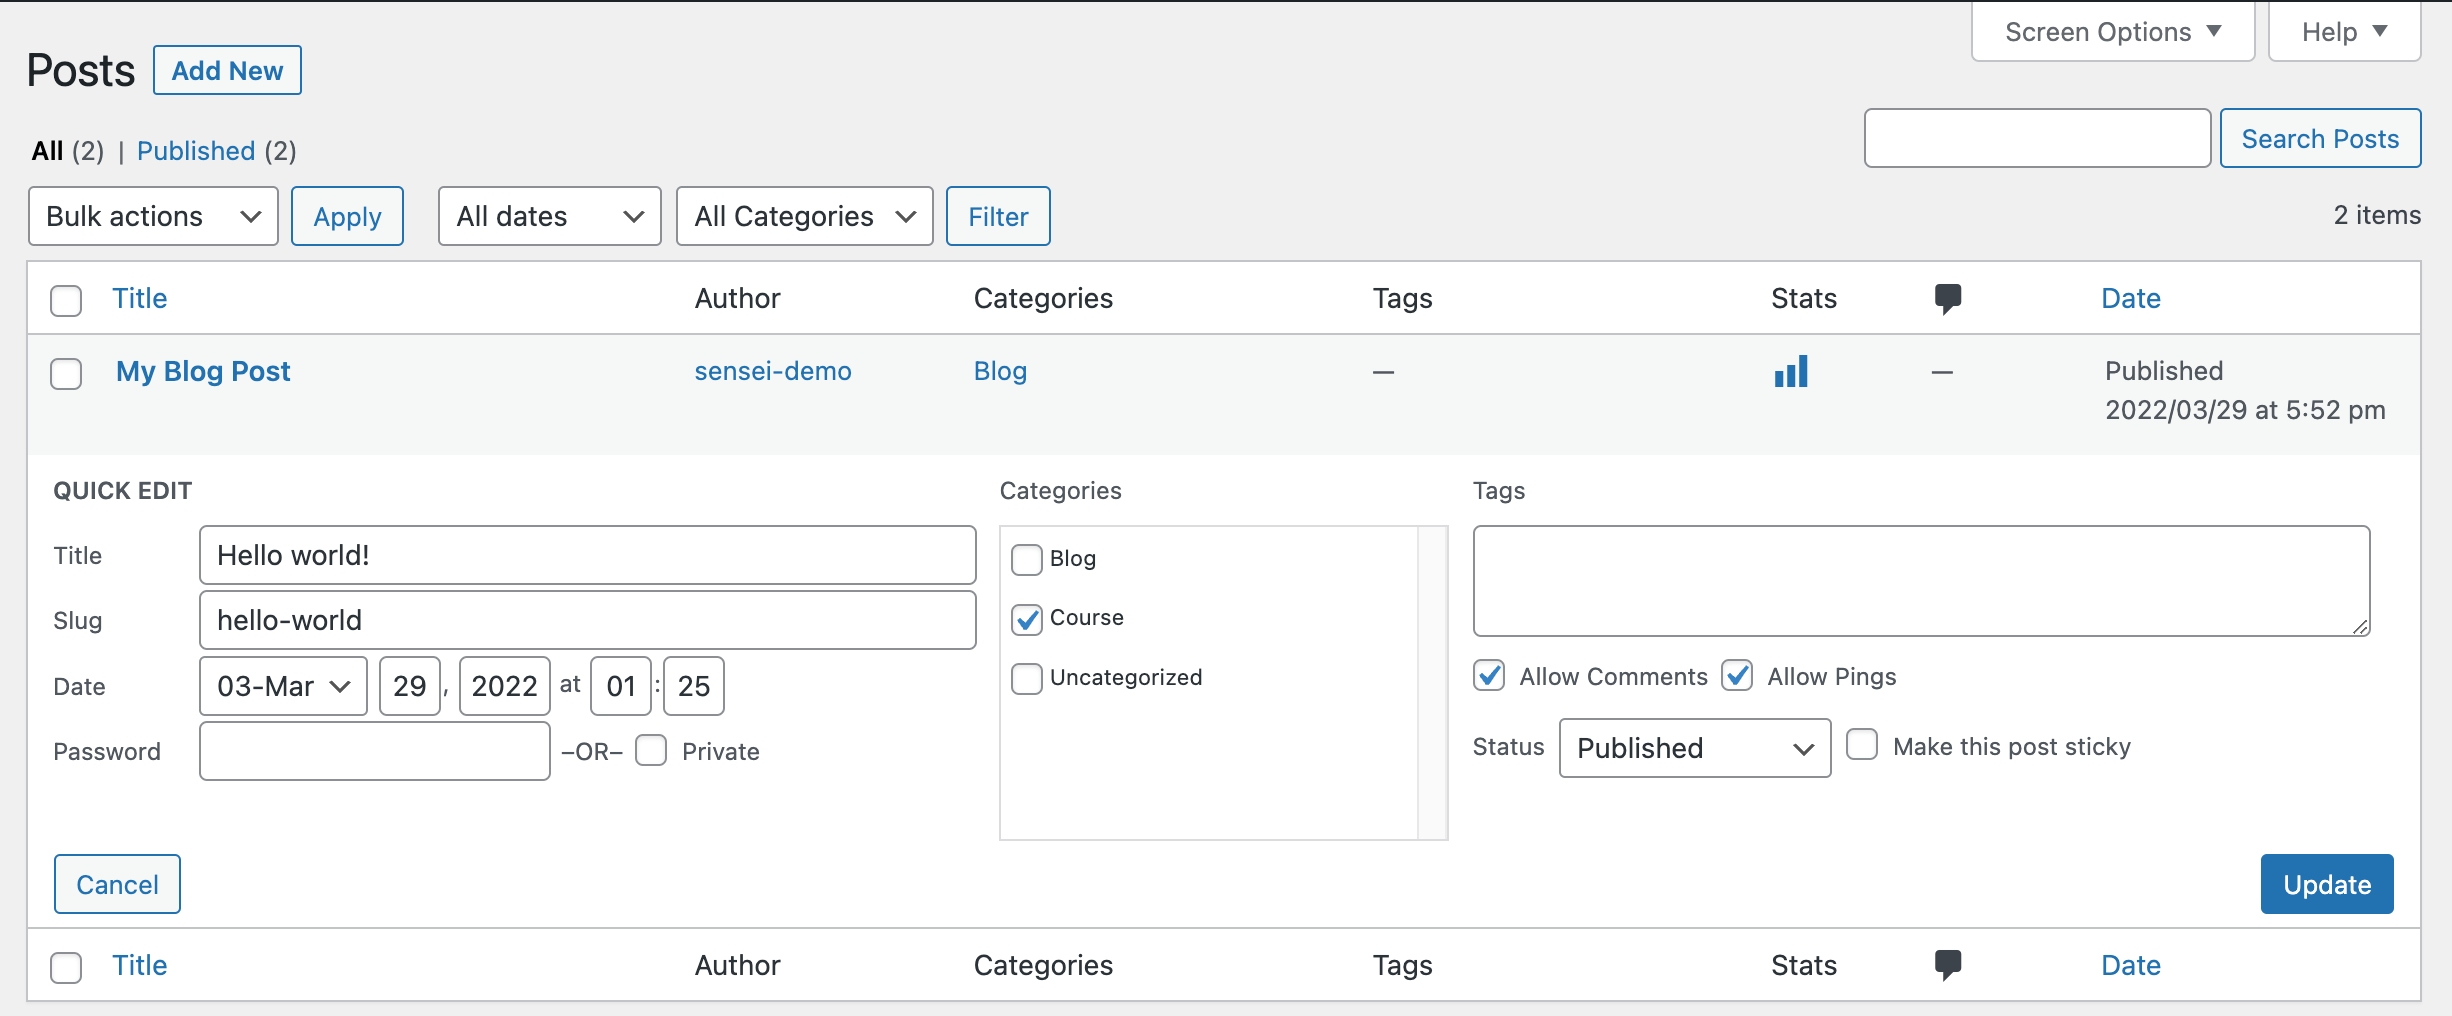
If all the posts don’t already share the same category, go to Posts > Categories and create a new category called Course or something that you will remember.
Then, go back to Posts > All Posts and use the ‘Quick Edit’ feature to ensure that each post for the lesson includes the Course category. It is ok if the post has more than one category assigned.
You’ll then need to install and active two free plugins on your WordPress site:
- Sensei LMS
- Sensei Post to Course Extension
Once installed, go to Tools > Posts to Course Creator in the WordPress dashboard.
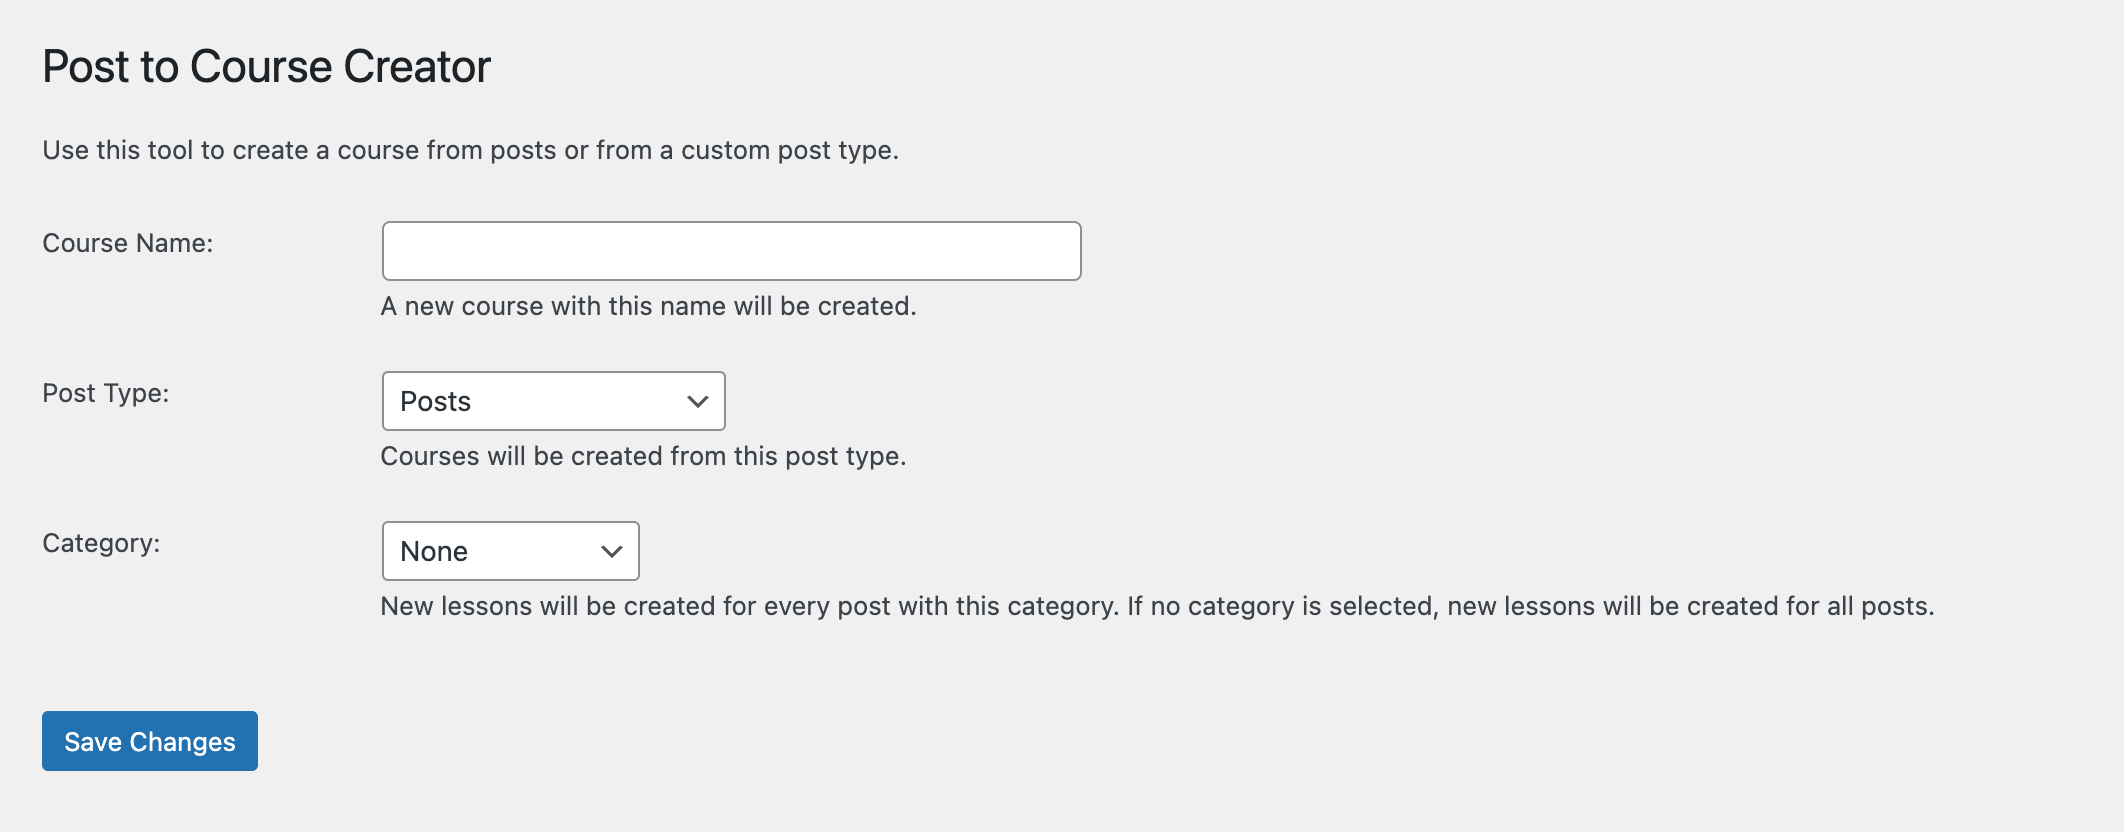
From here, you will choose a course name (don’t worry, this can be changed later), and select the category that you’ve created for the posts that have lesson content above.
Click ‘Save Changes‘ and that is it!
The import process will begin, and it should only take a minute or two at most.
When you visit Sensei LMS > Courses you will see your new course has been created.
Change Lesson Titles

You’ve done the most challenging part already, and now we just need to clean up the content a little before launching the course. Let’s start by changing the blog post titles into lesson titles.
The original title was written to be a blog post, which may be too long or too descriptive for a lesson in a course. We recommend shortening lesson titles to no more than 3 or 4 words in length. Lesson titles are shown in course outlines and when students are navigating a course, which is why shorter is better.
Go to Sensei LMS > Lessons, and you will see the lessons that have been imported.
Hover over each lesson and select the Quick Edit link.
Shorten the lesson title down to a few descriptive words for each. You don’t need to edit the ‘slug’ or anything else, but you can if you’d like.
Order Lessons
The next step is to order your brand new lessons so that they make sense for the course.
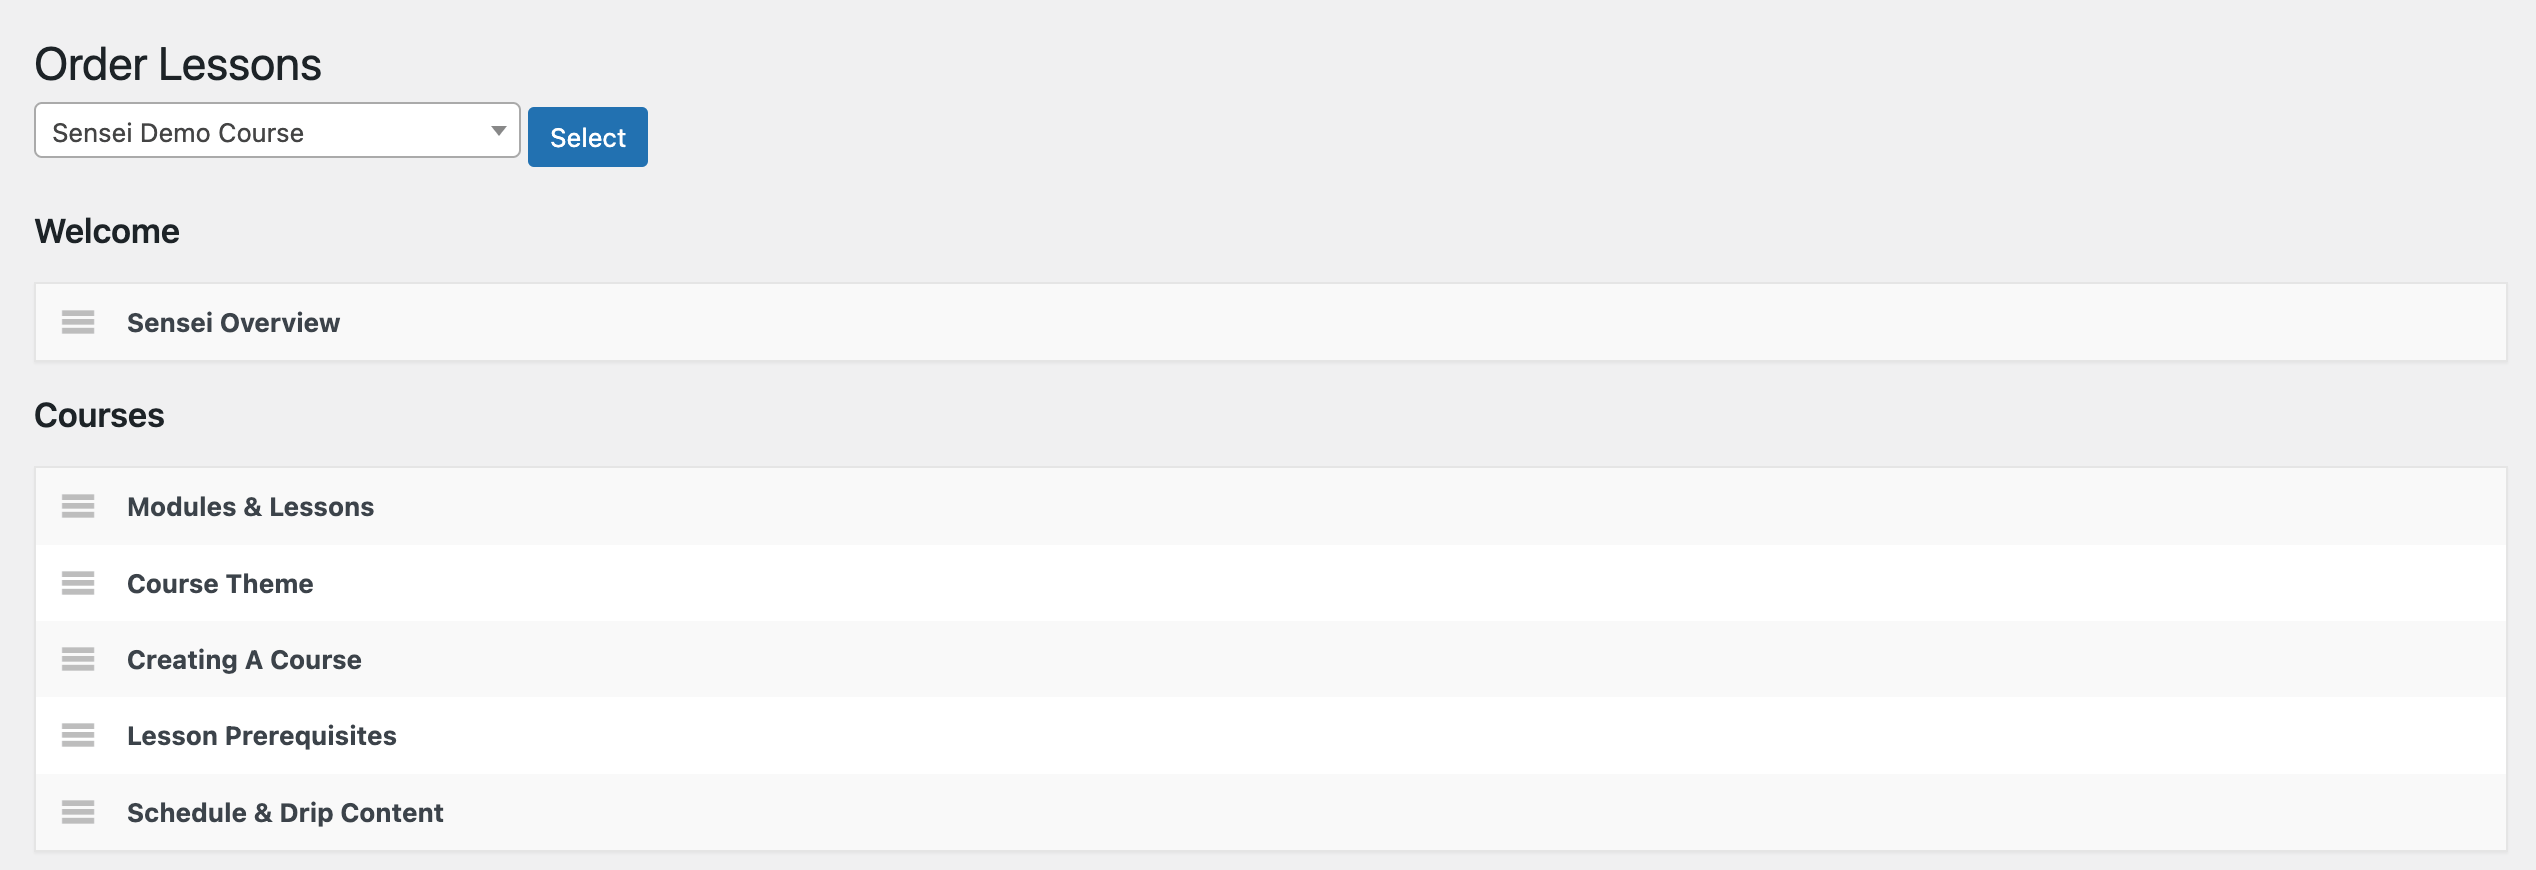
Go to Sensei LMS > Lessons and look for the link at the top to Order Lessons.
Choose the course and drag and drop the lessons into an order with the best flow.
Edit Lesson Transitions and Content
Depending on the original content in the blog posts, this step may take a little time.
You’ll want to now go back through each lesson, in order, and make sure that it flows nicely for students reading the posts back-to-back.
For example, you might want to add an introduction to the first lesson that shares more about you and the course objectives.
In the last lesson, you might want to include a thank you and any next steps such as a link to other resources, a community, or how to contact you.
You could spend a lot of time polishing up the content, embedding relevant videos (even better if you created them), adding more links, resources, or downloadable files.
Don’t worry, though, you can (and should!) always edit and improve your course content even after launching a course. So don’t try and make it perfect before getting your first students. We hate to be the one breaking the bad news, but your course will never be perfect. 😉
Add A Quiz Or Two
One thing that sets an online course apart from other forms of content is quizzes. Students need some type of feedback about their learning journey, and quizzes are one of the more straightforward ways to do it.
Quizzes don’t need to be long or complicated. You can choose from shorter quizzes at the end of each lesson or a longer quiz at the end of a course.
The type of questions you include will depend on your content. If your course is used for compliance or a certificate, you will typically see traditional multiple-choice questions to be the most common.
You might also try more open-ended questions, free responses, or ask the student to upload a file of their notes or work.
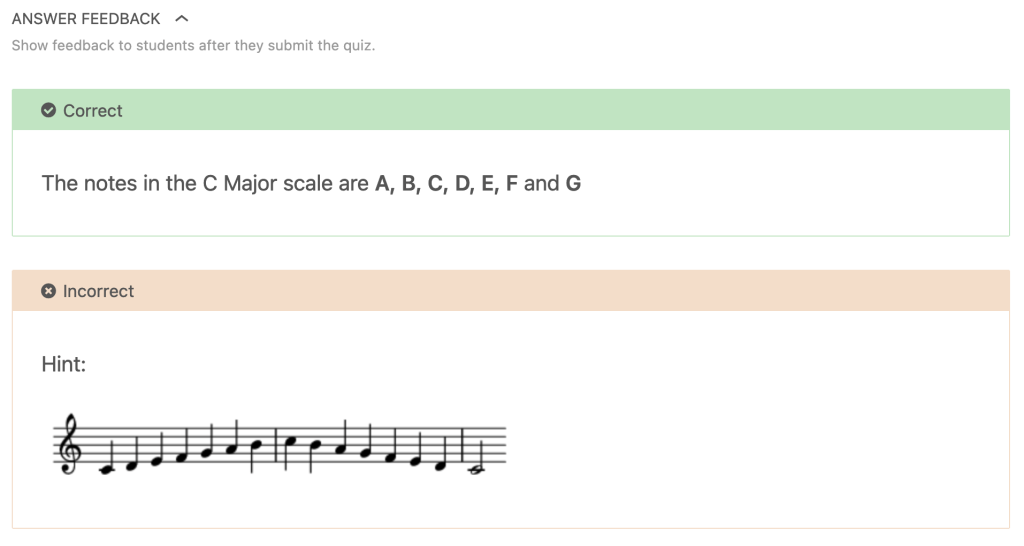
With several of the Sensei quiz question types, you can give feedback to the student based on if they get a question correct or not. This is a valuable opportunity to correct any misunderstandings and encourage students along the way.
Prepare For Launch
You are down to the last step — It is now time to go over your course settings, add a little information to the course landing page, and publish your first course!
If you are selling your course, check out our guide to using Sensei LMS with WooCommerce.
We recommend enabling Learning Mode for your course — our distraction-free learning environment that displays your course and lessons instead of your regular WordPress theme.
It’s true, just creating a course doesn’t mean you will have any students. You’ll need to work on a plan for promotion. One way to help with that would be to join our free Educators Community and share a link to your site. Experts and knowledge builders from around the world collaborate on best practices for building and selling courses.
And with that, we look forward to seeing your new course out in the wild!


