How to add clouds to videos on PC and online? How to add clouds to photos on PC and online? In this article, we will primarily present you with MiniTool’s free movie maker, which can help you create a beautiful cloud video.
Add Clouds to Videos and Photos on PC for Free
How to add clouds in video on PC? How to add clouds to a photo on PC? In this part, we will introduce you to the free video editor without watermark – MiniTool MovieMaker – to help you quickly make a cloud video.
MiniTool MovieMaker runs on Windows devices and comes with a user-friendly interface. Also, it offers basic and powerful editing tools, making it perfect for beginners and professionals alike.
It’s worth mentioning that the software features stunning animated stickers, including clouds, flowers, snowflakes, explosions, fires, and a lot more.
Due to the drag-and-drop and one-click functionalities, you can also easily add filters, text, and music to your photos or video clips to make them look more appealing.
Add Clouds to Videos and Photos in MiniTool MovieMaker
The following are detailed steps on how to add clouds in videos and photos using MiniTool MovieMaker.
Step 1. Import Your Videos and Photos
MiniTool MovieMakerClick to Download100%Clean & Safe
On your computer, download and install the MiniTool MovieMaker software, then launch it.
Close the Register window. Choose the desired aspect ratio and create a new project from the Project library window.
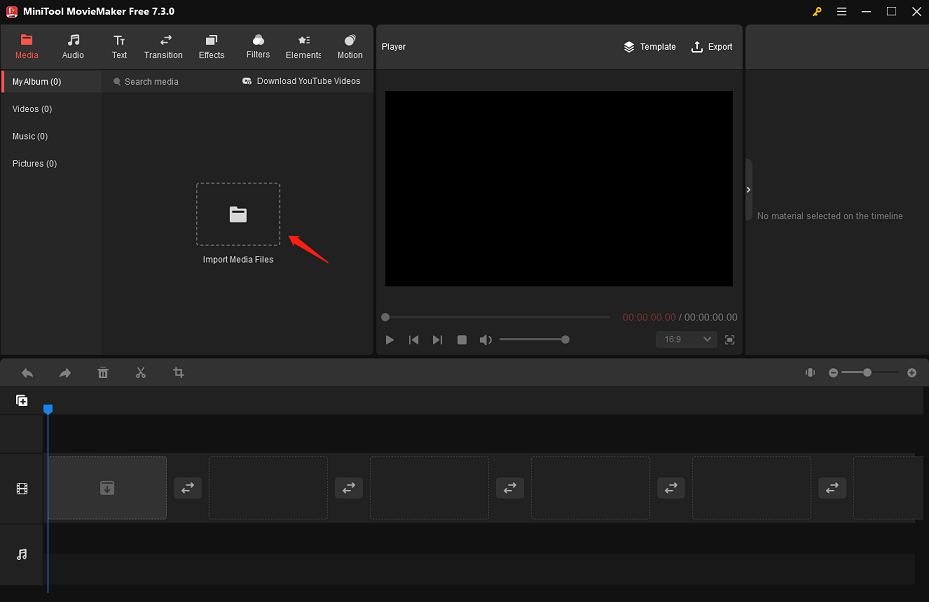
When you are in its editing interface, click the Import Media Files option under the Media tab to import your videos and photos from your computer.
Next, drag and drop the imported videos and photos onto the video track on the timeline.
Step 2. Add Music to the Whole Video
Place the playhead at the beginning of the whole video in the timeline. Go to Audio > Music to look for the music you wish to add. Download the music of your choice by clicking the Download icon on it.
Then, click on the + icon to add the downloaded music to the audio track in the timeline.
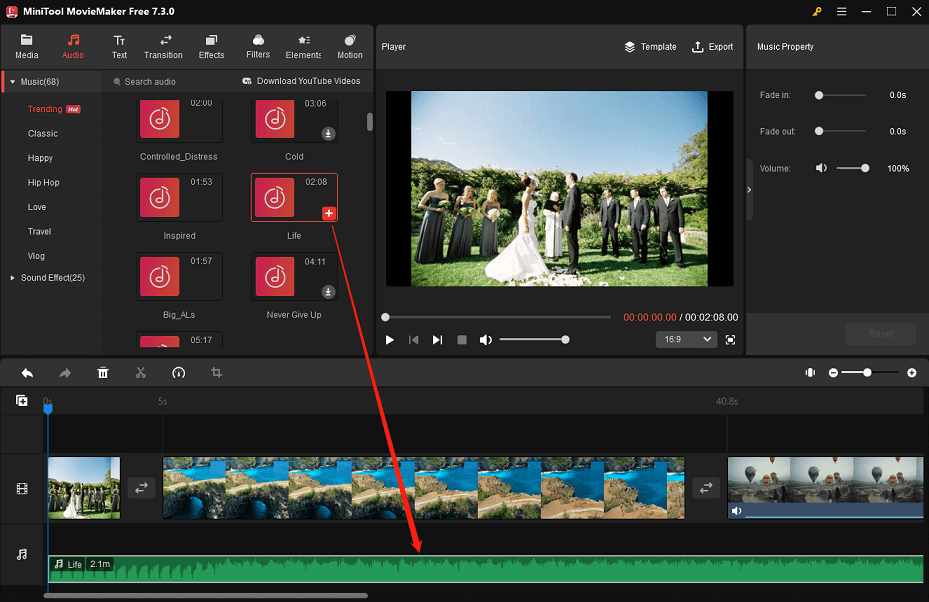
In the Music Property area, you can manipulate the sliders to fade the music in or out and adjust its volume.
Step 3. Add Text to Videos or Photos
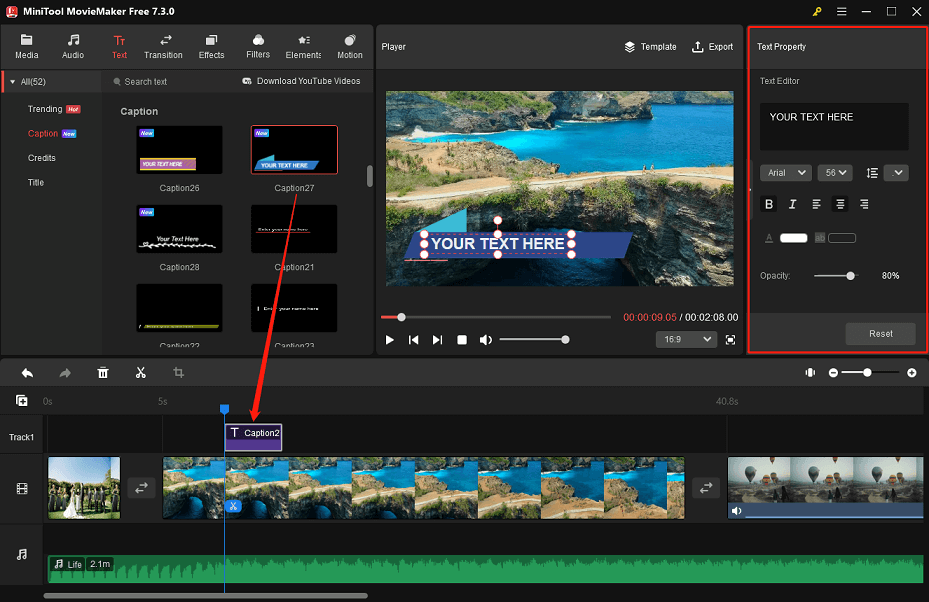
Head to the Text tab at the top. Access the caption library to find the text style you like. Download the caption template you want to use. Drag and drop the downloaded one onto the track above the target video or photo in the timeline.
In the Text Property area, you can customize the added caption template to suit your needs. For instance, input text relevant to your project and change the size, font, alignment, color, highlight color, opacity, etc.
Step 4. Add Filters to Photos or Videos
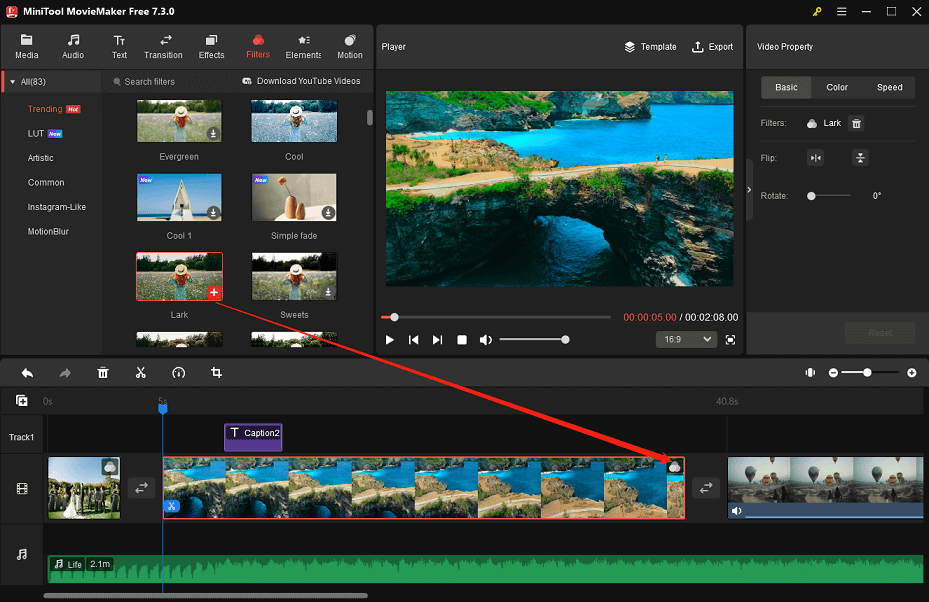
Switch to the top Filters tab. Find the filters you want to apply and download them. To add a filter to a photo or video clip, do the following:
- Click on the target photo or video clip on the timeline to highlight it.
- Hit the + icon on the downloaded filter you want to apply.
Follow the same operation to add filters to some other photos or videos on the timeline.
Step 5. Add Clouds to Videos and Photos
Move to the Elements tab at the top. To find the cloud sticker you need, you can use either of the following methods:
- Select the Nature sub-tab located on the left side to locate the cloud sticker.
- Enter “cloud” in the search box in the top left corner and press Enter to find this type of sticker.
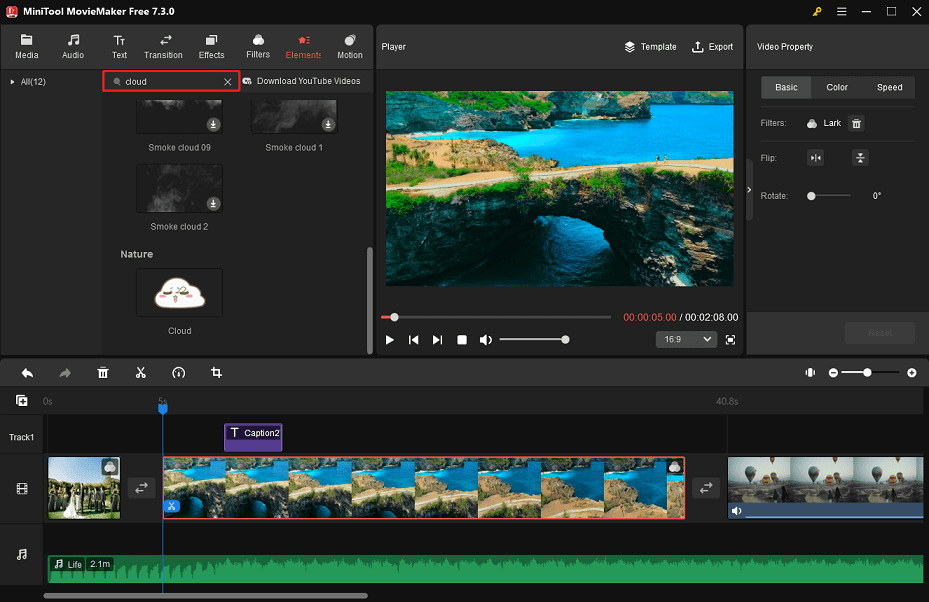
Highlight the target photo or video clip on the timeline. To obtain the cloud sticker you want, click the Download icon on it. After that, click the + icon to add the obtained cloud sticker to the highlighted photo or video clip on the timeline.
Place the mouse cursor over the cloud element on the timeline. When the cursor changes to arrows pointing in four directions, move the cloud element to where you want it to appear in the photo or video clip. Further, you can flip, rotate, and scale the cloud you add in the Elements Property area.

Repeat this process to add the same cloud sticker to other photos or videos on the timeline, then edit them.
Step 6. Export the Final Video
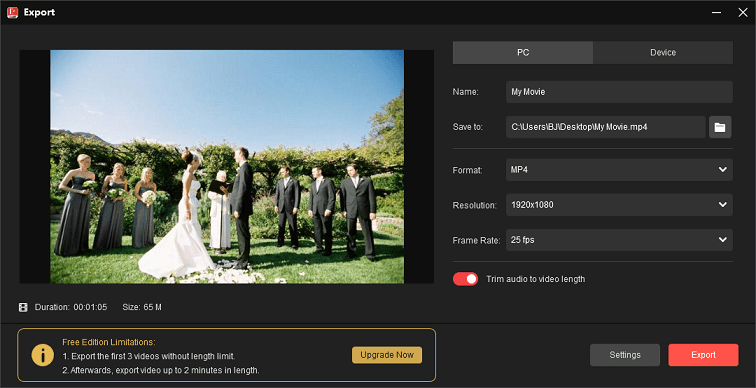
When you are satisfied with the edits you have made, click the Export option to bring up the output settings window.
Under the PC tab, give your final video a name and specify its target folder. Additionally, you can change the output format, resolution, frame rate, and more for the video.
If the previously added music exceeds the length of the whole video, please do not forget to enable the Trim audio to video length button.
In the end, click the Export button at the bottom to save the edited cloud video to your computer.
Some Big Features We Like About MiniTool MovieMaker
- It supports these video formats: MP4, WMV, MOV, MKV, AVI, WEBM, etc.
- It supports a range of photo formats: PNG, JPG, JPEG, GIF, ICO, etc.
- It supports the following audio formats: MP3, M4A, M4R, FLAC, WAV, AAC, etc.
- It provides you with embedded movie templates that include Love, Family&Friends, Travel, and Festival.
- It allows you to make video from images, videos, and sound effects or music.
- It gives you the ability to add a transition effect between two video clips.
- It enables you to apply filters to your videos in simple ways.
- It lets you add pan and zoom effects to your photos or video clips.
- It is capable of splitting, trimming, cropping, rotating, flipping, reversing, speeding up, or slowing down videos.
- It can be used to export video up to 1080p at no extra cost.
- …
Add Clouds to Videos and Photos Online for Free
How to add clouds to video online free? How to add clouds to photo online free? In this part, we will introduce you to the free cloud video maker online from FlexClip to help you make a cloud video in minutes.
It is a useful tool to compile many cloud stock videos and photos and make a beautiful video that features cloudscape or explains cloud formations. Explore the moving cloud video templates and attractive cloud videos and images to unleash your creativity!
With its help, upload your own media files and edit them by speeding up, slowing down, clipping, merging, and adding relaxing words, music, and effects to make a time-lapsing cloud video capturing the feeling of emptiness as well as letting go of thoughts and worries.

Add Clouds to Videos and Photos in FlexClip
For adding clouds to pictures and videos using FlexClip, follow the simple steps below.
Step 1: Access FlexClip’s editing page via your browser.
Step 2: Upload your videos and photos to the tool.
Step 3: Drag and drop the uploaded videos and photos to the timeline.
Step 4: Click the Elements tab on the left-hand side. Type “cloud” into the search bar at the top and press Enter. Some cloud stickers will appear here for you to use.
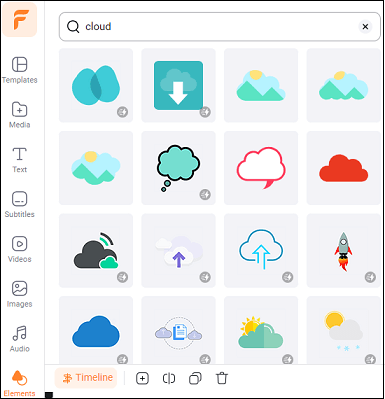
Step 5: Add your favorite ones to target videos or photos on the timeline.
Step 6: Customize the size, position, and rotation of the cloud stickers you add in the player window.
Step 7: Make additional edits to the cloud video, like adding music, text, and voiceover.
Step 8: Download your cloud video in a variety of definitions and ratios or share it online with the whole world.
Some Big Features We Like About FlexClip
- It is free and has a simple interface.
- It provides a wide range of stock images, music, and videos.
- It supports many video, photo, and audio formats, like MP4, MOV, GIF, PNG, MP3, etc.
- It allows you to split and trim your video freely.
- It enables you to export your video at a high resolution.
- …
Apps for Adding Clouds to Pictures on iOS and Android
How to add clouds to a photo on iOS and Android? In this section, you’ll learn about two photo editing tools to help you do just that.
Apowersoft Background Eraser
Apowersoft Background Eraser is among the top photo background editors that can work for both iOS and Android users. Using this handy tool, you can remove the background with one click.
It will automatically and precisely separate the foreground from its background. Besides, it includes three editing tools to assist you in tuning your cutout.
Users can flip the object, make copies of the cutout, as well as zoom in and out the photo. After making the photo background transparent, you can use it to add clouds to photos.
As soon as completed editing, the app supports many formats, such as PNG, JPG, JPEG, TIF, BMP, and so on. You can directly download the photo or share the design on social media platforms.

PicsArt
PicsArt is a great app to add clouds to a photo. You can use it to take and edit pictures. Then, share them on the PicsArt community or other social media platforms.
The app contains a range of features. It lets you change the photo background manually or automatically, make collages, add text and stickers, modify the saturation, apply filters, and so on.
But the pop-up ads might sometimes annoy you. On top of that, PicsArt is a robust photo editor that you should give it a try. Moreover, it is available for both Android and iOS.
Bottom Line
How to add clouds to video on Windows PC? And how to add clouds to video online free? In this guide, we recommend using MiniTool MovieMaker and FlexClip because they both offer this type of visual effect. Other than using the two apps to add clouds to a photo, you can also try the following photo editors: Apowersoft Background Eraser and PicsArt. Let your creativity run wild with these video or photo editing tools now!
Please contact us at [email protected] if you have any questions about using MiniTool MovieMaker.
You may also like the following:
About The Author

Position: Columnist
Jocelin is keeping a strong passion for the multimedia industry with her first thoughts and visions. While continuously absorbing relevant knowledge, she believes that pictures, videos, and music can bring so much pleasure to life. To go deeper into the industry, she has acquired many skills in video editing. Also, she can provide readers with ways to solve problems on image, video, and auido topics.