
How To Edit Your TikTok Videos Effectively
Do you have questions about how to edit videos on Tiktok? To get you started, here are some of the most vital pieces of advice, unwritten norms, and best practises.
TikTok is one of the most popular video-focused social media apps in 2022, and with reason! Of course, creators can post fantastic videos with music, skits, challenges, and other features. But what makes TikTok so popular is that it is a creative haven.
If you’re new to TikTok or want to brush up on your skills, we’ve got you covered! We’ll show you how to record and edit the perfect TikTok videos in this article!
The Built-In Editor
TikTok has its own built-in editor that can perform a variety of basic tasks such as filtering, blurring TikTok video, adding soundtracks, and more. Let’s take a look at the fundamental interface.
When you launch TikTok, the app will show you a video that it believes you will enjoy. You can pause the video at any time by tapping the “+” icon and starting your own.
ad
This article will cover a number of pages, but this is where we begin. Here’s how to make a TikTok video:
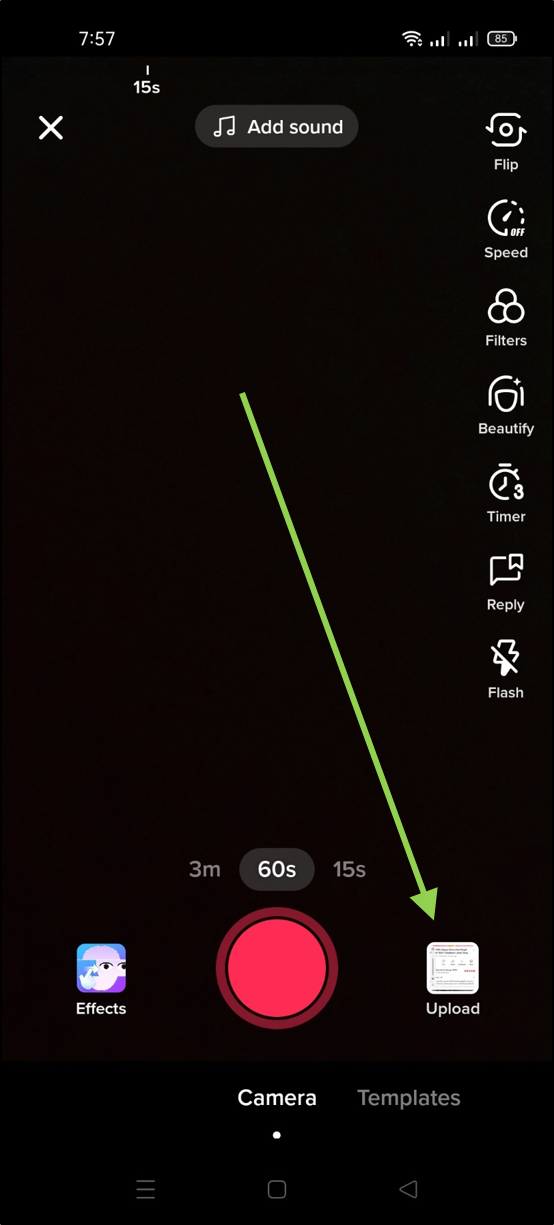
- Choose any effects you want to use in your video.
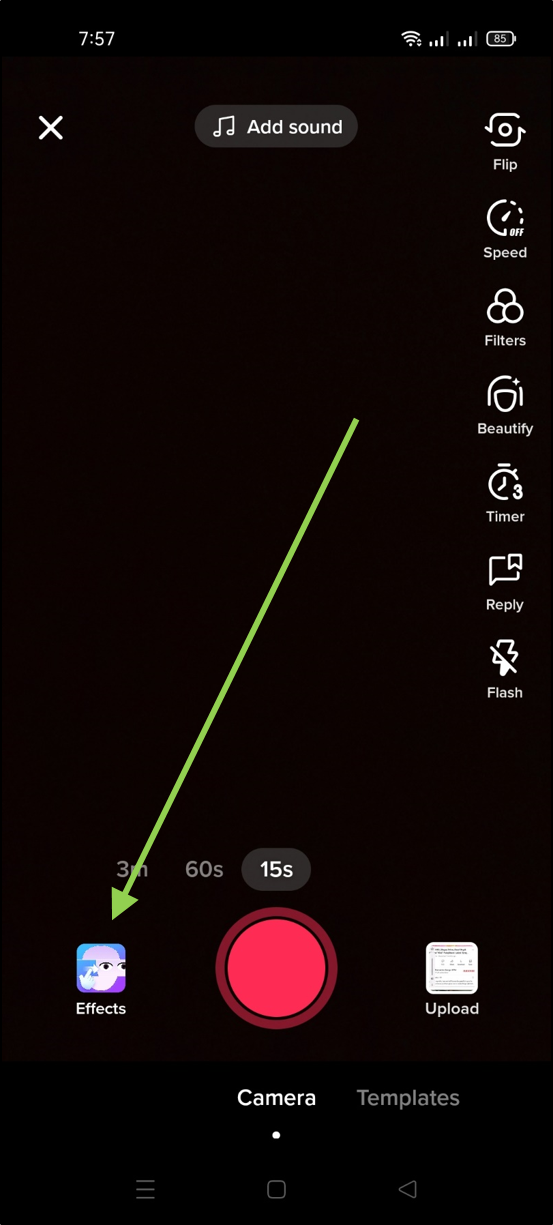
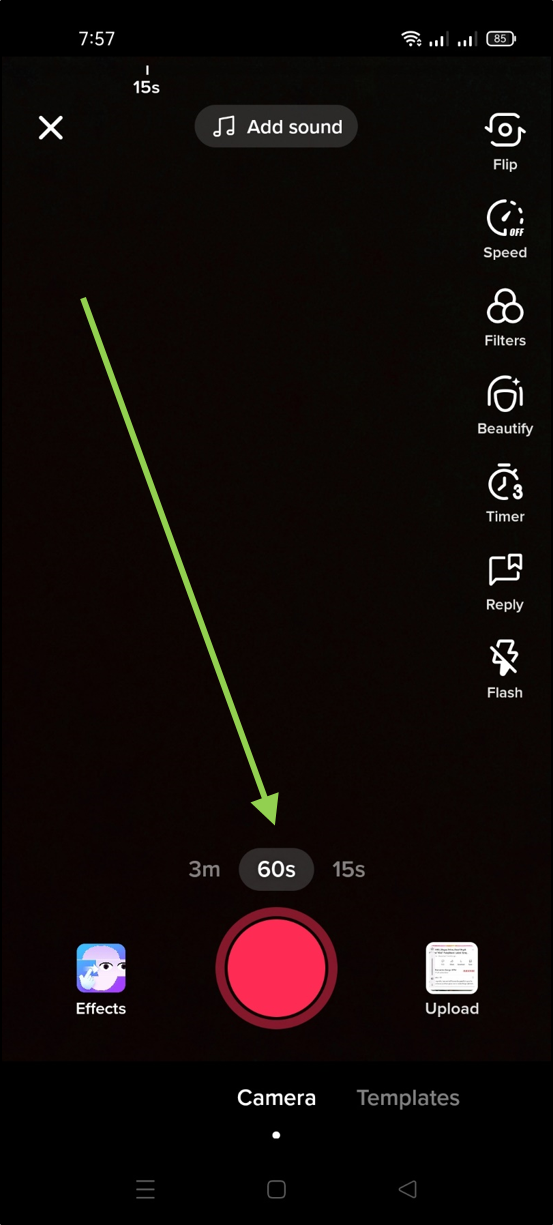
- To change the time frame of your video, use the time selector at the bottom part of the screen
- Tap on the ‘Add sound’ option if you want to add music.
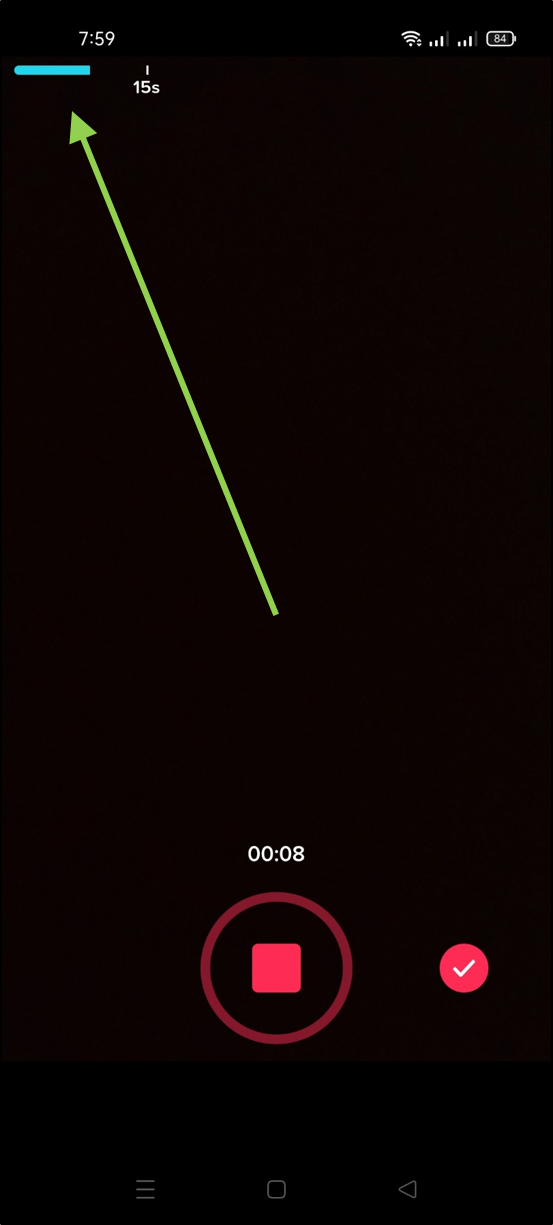
- Tap on the red record icon in the center of the screen. Tap it again when you are finished recording.
- Use the blue line at the top as an indicator for how much you have recorded and how much time that you have left.
- You can also upload an existing video from your phone’s camera roll by tapping on the ‘Upload’ icon in the lower right corner (this is the option for you if you want to use an external video editor, as we’ll explain further below).
After you’ve recorded your video, you can proceed to the editing process.
READ MORE:
- Learn how to add two songs in TikTok video
- Learn to how to download TikTok Videos Without Watermark
- Do you know how to create and add stickers on TikTok video?
- Learn how to trim a TikTok video
Know TikTok’s Editing Tools
There are numerous methods for editing your TikTok video. This section will break them down for you.
Let’s begin in the upper-left corner and work our way around the screen. For this walkthrough, we’ll be using the Android version of the app, but the iOS version is very similar.
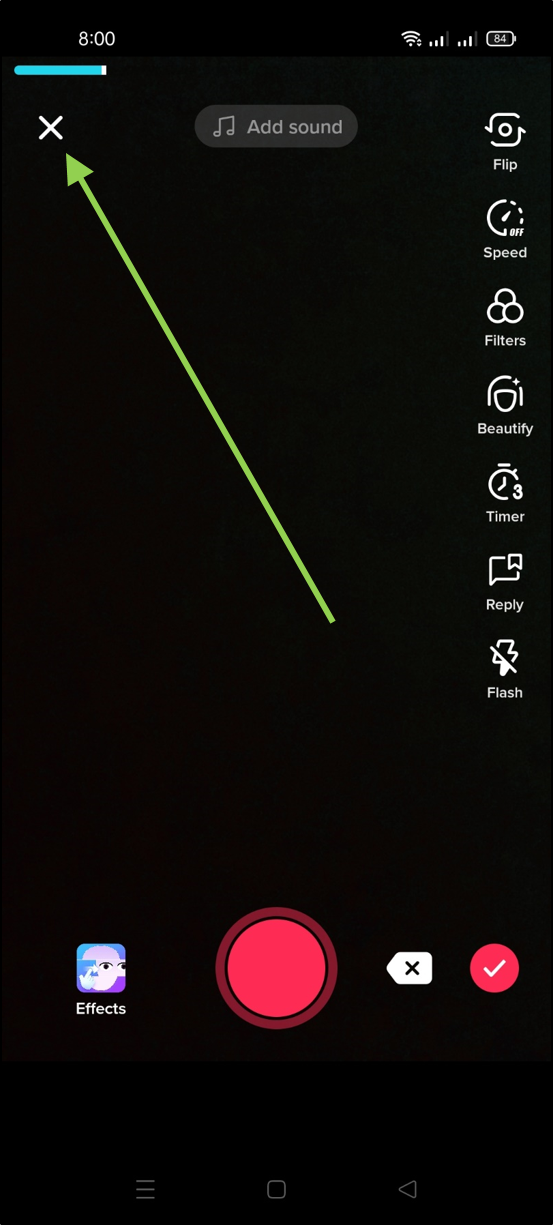
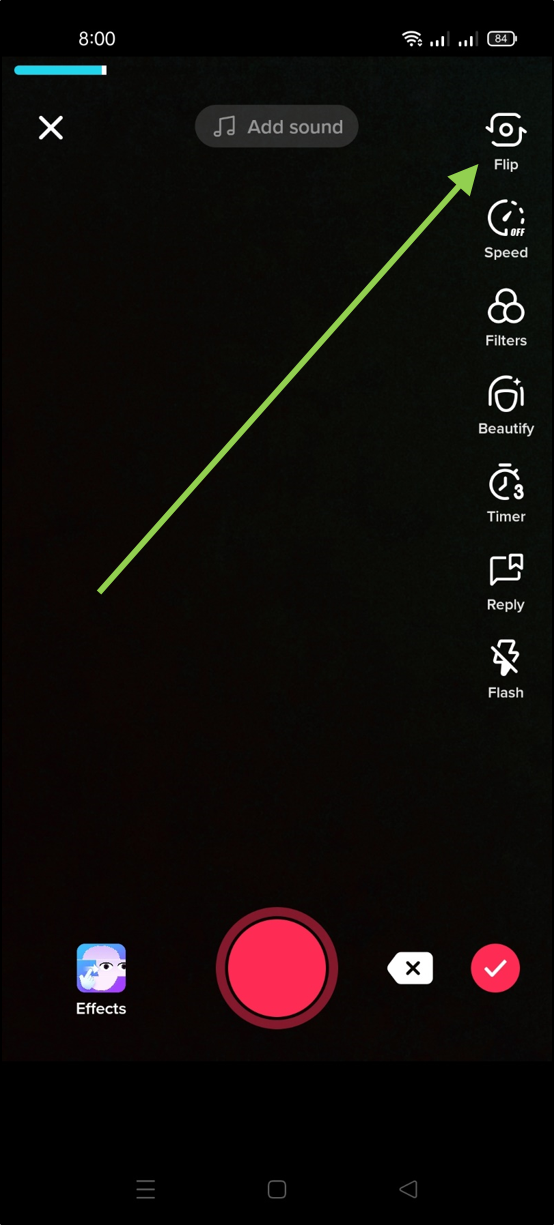
The “X” icon cancels your recording and editing session.
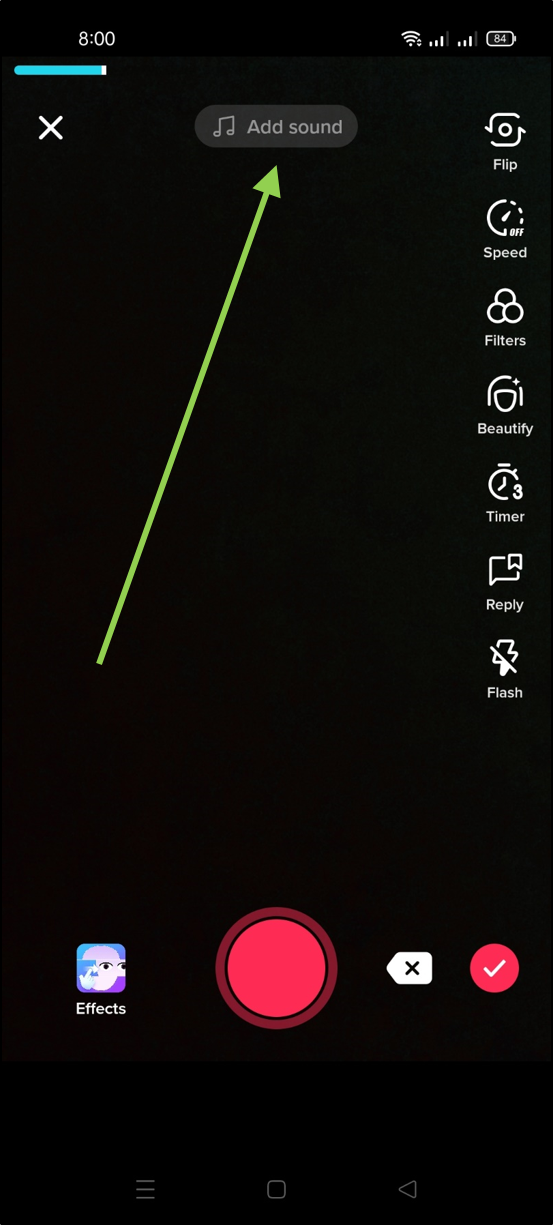
The “Add a sound” command accesses TikTok’s vast and extensive sound library. You can choose a song, search for keywords, browse TikTok playlists, and so on. You cannot upload your own sounds, but there are some workarounds discussed in this article. Tap this button before you begin recording to ensure that your video is synchronized with the song or sounds you choose.
The “Flip” button changes from your front to your rear camera, useful for taking selfie videos.
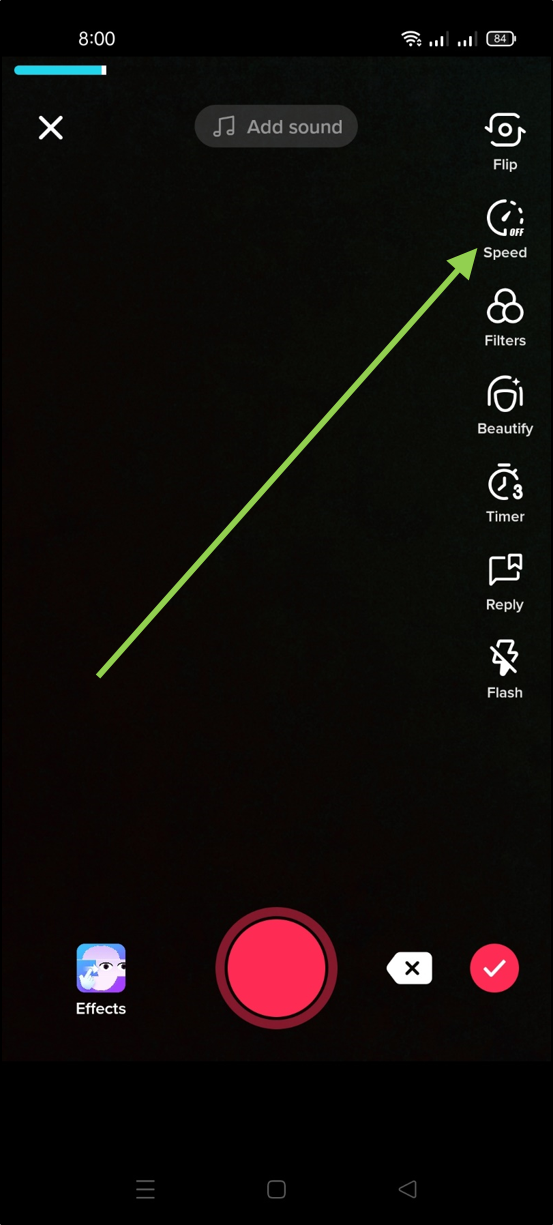
You can change the recording/playback speed of your video using the “Speed” button. The settings range from 0.1x to 3x, allowing you to play your video at speeds ranging from 10:1 slow motion to 3:1 fast motion.
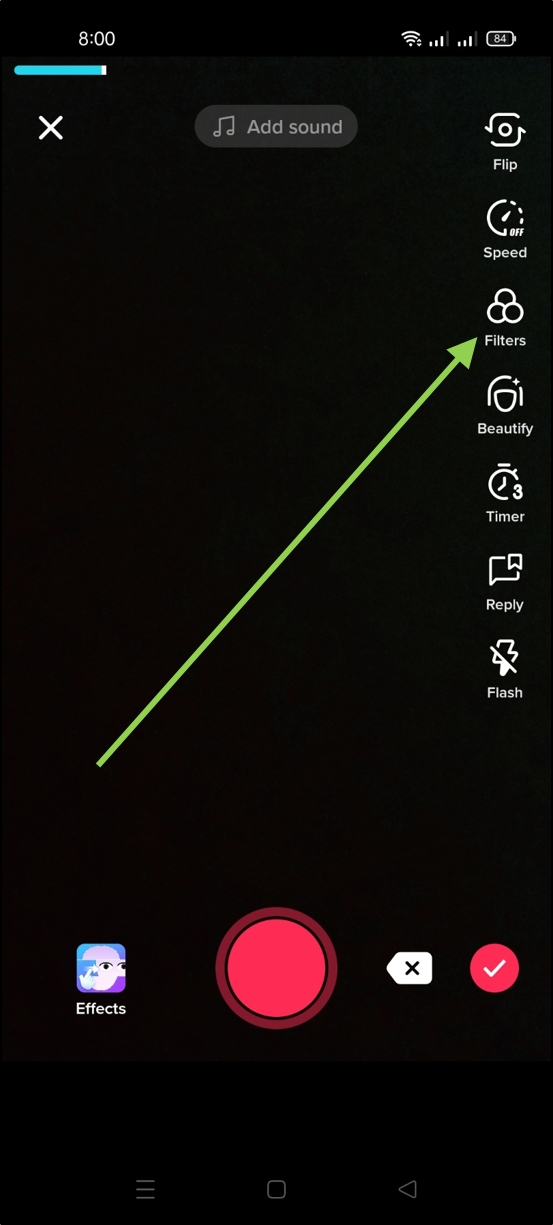
The “Filters” button accesses TikTok’s filter library, which is divided into “Portrait,” “Life,” and “Vibe” sections. These are simple filters that change the color palette and image contrast, and they are organized numerically rather than with clever names. To return to the unfiltered view of the world, choose the first filter under the “Portrait” section, labeled “Normal.”
The “Beauty” button toggles Beauty mode on or off; all this mode does is some subtle removal of shadows.

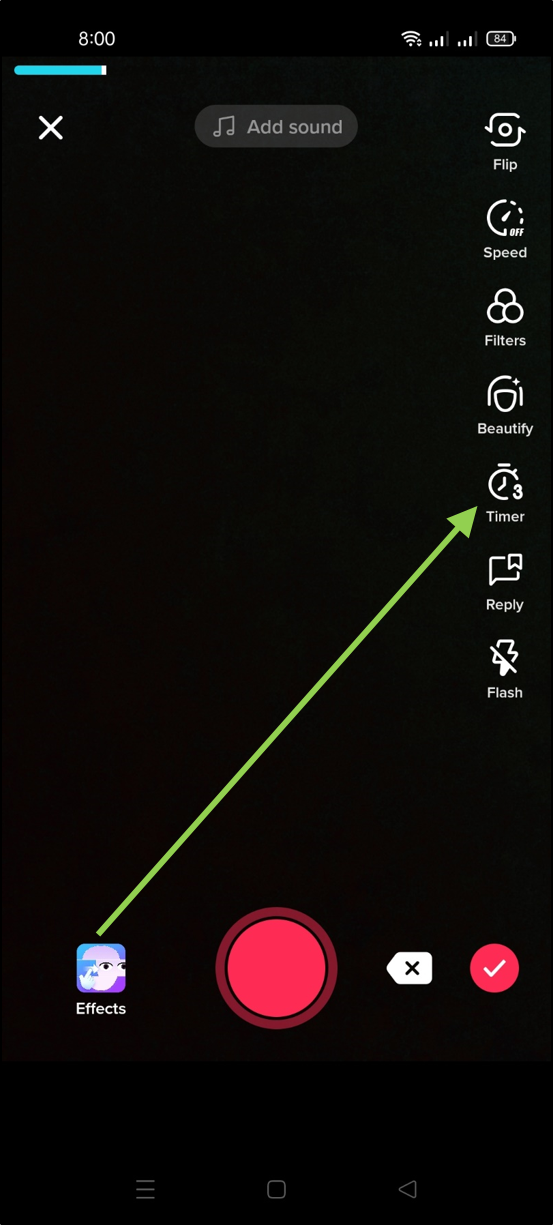
The “Timer” button opens a timer interface that shows a video timeline of up to 60 seconds. You can tap the point at which you want to stop (from 1 to 60 seconds) and then tap “Start recording” to start auto-recording without having to hold down the recording button.
Next is the flash button. This newer option lets you turn on or off the flash depending on the lighting you need.
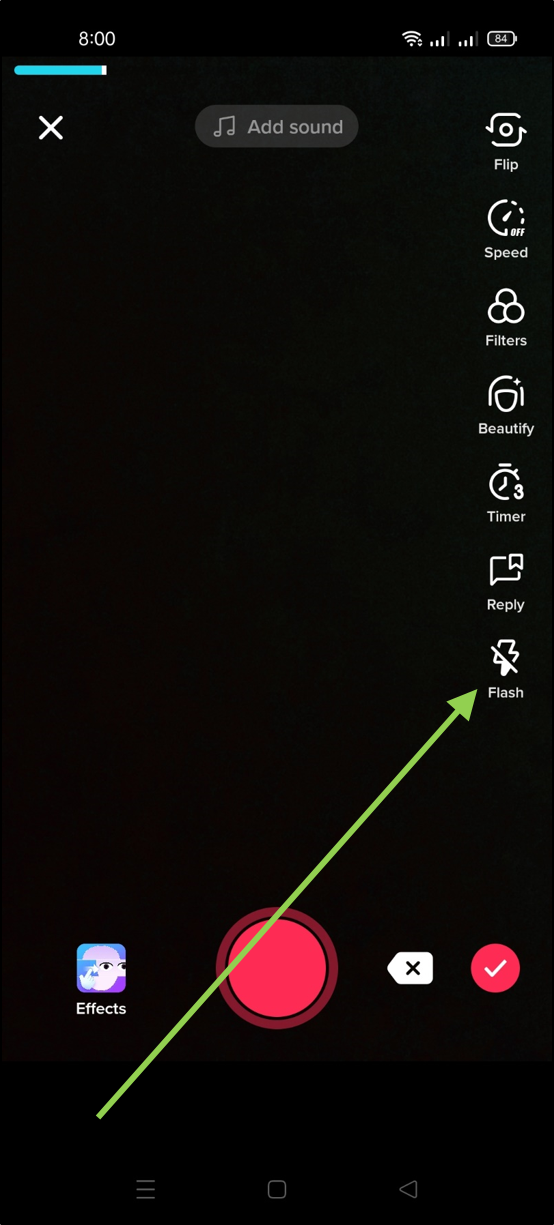
To the right of the recording button is the “Upload” button, which opens your phone’s video gallery and allows you to select a video to upload. This is how you can import videos created or edited in other programs into your TikTok feed.
When you want to start a recording without using the timer, press the recording button (the big red circle).
The “Effects” button accesses TikTok’s extensive special effects library, which includes everything from digital enhancements to split screens to augmented reality (AR) filters. This is the place to go if you want to add giant googly eyes, rainbow swirl effects, and other video enhancements. There are sections for “Face,” “Trending,” and “Animal” effects.

Editing Your Video
There are two new buttons to the right of the recording button. The X button cancels this segment’s recording, while the check button saves it and takes you to the post-processing interface.
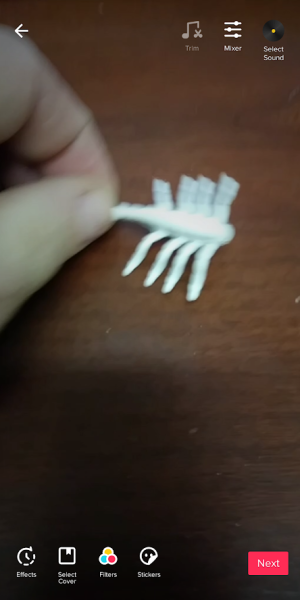
Your video segment will autoloop in this interface.
To extend the segment, press the back button to return to the recording interface.
To shorten your video, use the “Trim” button.
The “Mixer” button brings you to the mixer interface, where you can adjust the relative sound levels between the recorded sound and the soundtrack you chose earlier.
“Select Sound” opens the sound interface and lets you bring in music or sounds from the TikTok library, just like in the previous screen.
📚 Also Read: How to Get Front Flash on TikTok
How to Edit Segments on TikTok
The “Effects” button does something very different than it did on the previous screen. It opens a library of different effects, along with a timeline of your video, allowing you to apply effects only to sections of the video. This is a very powerful feature and is where a lot of the innovative effects you see in TikTok videos are created.
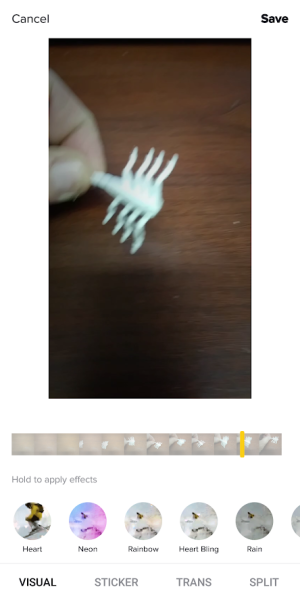
The “Set Cover” button selects a frame from your video as the cover for the video which other users see when they are browsing videos. This lets you pick a representative frame rather than just the first frame of the video, which might be empty or boring.
The “Filters” button applies a filter to the whole segment, just like it did in the pre-recording interface.
The “Stickers” button opens the stickers library, which allows you to add animated stickers to the video. Once you select a sticker, you can drag it around on the screen to change where it appears while the video plays.
Finally, the “Next” button takes you to the posting interface.
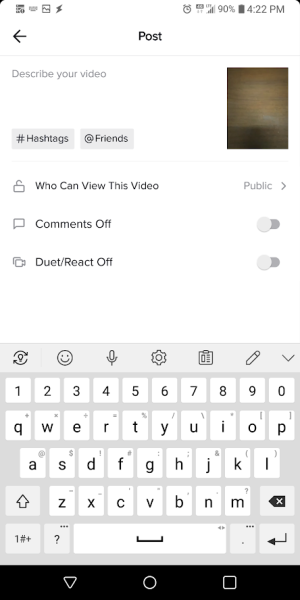
Post Your Video
Your video segment will play on autoloop in this interface.
To continue the segment, press the back button to return to the recording interface.
To shorten your video, click the “Trim” button.
The “Mixer” button brings you to the mixer interface, where you can adjust the relative sound levels between the sound you recorded and the soundtrack you chose earlier.
Using an External Editor
You will be able to do a lot more if you use an external editor to look at your TikTok videos. The TikTok editor has a lot of features, but it’s not a full-fledged video editor. However, before using another video editor, you must first download your TikTok video.
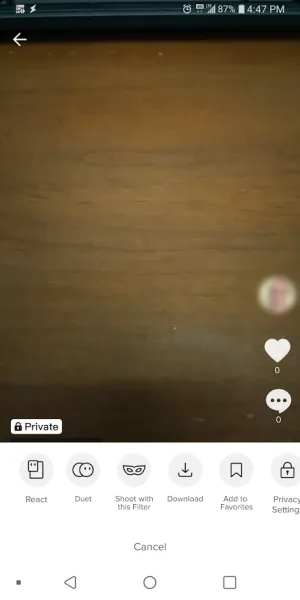
You must first post the video in order to download it. It cannot remain in your draft folder; it must be published on the site. So, on the video, set the “who can view this” toggle to “private,” and then post the video. Once it’s posted, go to your TikTok profile, select the video, then tap the three dots icon and select “Download” to save it to your local device.
Video Editing Using Apps
A variety of video editing apps are available for your smartphone or tablet. They have the benefit of being convenient and useful. They have the disadvantage of not being significantly more powerful or feature-rich than TikTok’s built-in editor. However, if they have specific features that you require, it may be worthwhile to test them out. Popular video editing apps for Android include Power Director, Timbre, Vizmato, YouCut, and InShot. iPhone users may be interested in iMovie, Splice, or Filmmaker Pro Video Editor for iOS.
Video Editors for the Desktop
A desktop video editor allows for far more serious video editing work. Your PC or Mac is far more powerful than your smartphone, with a larger screen and more precise interface tools. If you go this route, I would recommend hiring a professional editor. There are free editors available, and some of them are quite good, but you won’t be able to get anything better than the built-in TikTok editor without paying. Here are some of the best editors available.
Adobe Photoshop Elements
Adobe Premiere Elements is a simplified version of Adobe Premiere CC video editing software. Elements retains the main features of its larger parent but eliminates much of the functionality that only videographers require in order to keep the price low and the learning curve manageable. If you’ve used Adobe products before, Elements will feel right at home. Elements offers a wide range of tools, video effects, and media library management options, making it ideal for TikTok users who plan to create a variety of videos.
Premiere Elements costs $99, but there is a free trial available to see if it meets your needs before purchasing it.
Corel Video Studio
Corel used to be the best company for computer graphics software, and the company still has a good name in the world of video editing. Corel VideoStudio is a powerful video editor for home use. Even though it’s not as good as Avid Media Composer, it doesn’t cost as much and isn’t as hard to learn. It has a lot of professional features and an easy-to-use user interface.
The Pro version of Corel Video Studio costs $69, and the Ultimate version costs $99. Both are very strong and can easily handle your TikTok videos. You can also try it out for free.
Video Creation Tips and Tricks
When you start getting serious about creating Tik Tok videos, there are a lot of advanced tips you’ll want to be aware of. Here are a few of our favorites.
Make use of a desktop video editor.
If you’re making and editing a lot of videos, you’ll quickly discover that the built-in editor, as well as the available app-based editors, while adequate for the casual creator, lack the full feature set and performance of a full-fledged video editing suite on a desktop computer. Not only is a desktop computer’s display far superior for viewing video files, but the CPU and memory performance of a desktop or laptop computer will also be far superior to even a high-end smartphone.
Purchase a Video Camera and a Tripod.
These days, smartphones have great cameras for how small and cheap they are, and just like with video editing, the camera on your phone is more than enough to get started. But once you’re done with the beginning, you’ll want to buy a nice full-sized video camera. You can get a very nice digital video camera for $40 to $100, which is good news. Look for features like inputs for external microphones, optical zoom, a large LCD screen for framing your shots, the ability to output lower-resolution video files, and manual white balance, focus, and exposure controls. Even if you don’t buy a full-sized camera, you should still buy a tripod. Tripods keep your camera steady and make your videos rock solid. They also make it easy to change the angle and position of your camera.
Turn it On
Lighting is essential. Depending on the type of video you’re making, you may be able to use natural lighting (if you have the right environment and don’t mind shooting only during daylight hours), but for the majority of creators, artificial lighting will be required. High-energy LEDs are the best lights because they produce a white, crisp light that is ideal for video and photography work. If you’re shooting large-area videos that include dancing or movement, you’ll need three lights: a key (or spot) light, a fill light, and a backlight. Instead, creators who make more in-your-face selfie-style videos should invest in a ring light, such as the one we recommend at the end of this article.
Backgrounds are essential
What happens behind the scenes is frequently just as important as what happens in front of the camera. A sloppy apartment or kitchen countertop isn’t the best setting for your heartfelt torch song video. Make sure there are no reflective or shiny surfaces in the background, as these can throw off your lighting or include the camera inadvertently in the shot. A single-color bedsheet can serve as a solid backdrop, but make sure your performance is a few feet in front of it to avoid casting distracting shadows.
It’s All About the Music
People are often willing to forgive poor video quality, but as soon as they can’t hear or decipher what they’re hearing, they hit the back button and move on to something else. Nobody has time to waste listening to something they can’t understand. Although some smartphones and digital video cameras have decent internal microphones, an external microphone will always provide better sound quality. Even a low-cost external microphone will improve your sound quality significantly. The microphone should be placed as close to the video’s subject as possible. Be aware of background noises in your environment that you may have long since learned to ignore, but that a video viewer will notice right away.
The Rule of Thirds
The rule of thirds is a fundamental concept in photography and videography that envisions an imaginary 33 grid being laid out over the field of your camera.
You want your subject(s) to be placed along one of the grid lines, rather than in the center of the shot, for an appealing and compelling video or photo. If at all possible, place the subject at the intersection of gridlines – those four “sweet spots.” This rule has no theoretical basis; it simply states that people find images that adhere to the rule more appealing than images that do not.
Make a Statement
Screen presence – that quality that some people have that makes the camera seem to adore them – can be a gift at times. Many fine actors are simply good actors with great screen presence. If you weren’t born with Cary Grant’s natural camera appeal, you’ll have to work hard to cultivate the traits and behaviors that translate into a charismatic on-screen presence. Maintain a calm and open body language by facing the camera and not putting your arms in front of your body. Maintain proper posture by standing up straight! You should have your shoulders back and be relaxed. Breathe deeply, both consciously and unconsciously.
Give the audience some smiles, especially at the beginning of the video, so they perceive you as friendly. When speaking, enunciate your words and deliberately slow down your video recording– almost everyone tries to talk too fast on camera. If you don’t know what to do with your hands, make some – a magic wand for a magician, a microphone (even a dummy one) for a singer. And practice – the second or third (or tenth or twentieth) run-through of a video is almost always a much better effort than the first, especially if you’re reviewing your own takes and learning from each glitched run-through.
ad
Comments are closed.